Congratulations, Lisa (THE most common name for girls born in the 1960s after all!) Please send me an email with your upstate NY address and the book will be coming in your direction.
Judith

A TECHNIQUE DRIVEN Blog dedicated to mastery of surface design techniques. First we dye, overdye, paint, stitch, resist, tie, fold, silk screen, stamp, thermofax, batik, bejewel, stretch, shrink, sprinkle, Smooch, fuse, slice, dice, AND then we set it on fire using a variety of heat tools.
Tuesday, July 31, 2012
A Bit of Progress--Quilter Beth
As you can see in the picture below, I didn't get the gesso on my piece. I did, however, get the hand stitching done. I'll gesso tonight and get the painting started tomorrow. Check back.

Monday, July 30, 2012
New Piece--Quilter Beth
I'm sorry my post is SO late, but I have been gone most of the month. I did have time to start my piece using this month's technique today after I got home. Let me tell you what I have done so far.
I started by dipping my muslin into the mixture of glue and water, and let it dry overnight. I decided I wanted my piece to finish a bit flatter, so I did iron it a little using a press cloth. I left some of the wrinkles in it, but overall it is fairly flat.
Here is some of my "stuff." In this picture, I'm backing it all with Misty Fuse using a couple of non-stick sheets as pressing cloths.


Sunday, July 29, 2012
Check out Amy's Experiments
Wow! Amy at Amy Etcetera gave us a link to her experiments with muslin, cheesecloth, and tissue. Which is your favorite? The stained glass, tree bark, or "Seaweed Vortex"?
Playing with Paper

So I took some muslin and dipped it in the glue/water solution per Rosalita's instructions. It finished with a pleasantly textured result. I also did some cheesecloth and added some paint to the solution -- I'll talk about that in a future post. Then I took some of my precious Godiva tissue paper and did the diluted glue dip. It was kind of boring like that, so I added a couple of pieces of paper towels that I had used for clean up on a previous project.

The whole thing started to remind me of the ground after a hard rainstorm in late fall (except for the color), so I added a few maple pods for a resist.

I sprayed the whole thing with walnut antiquing spray and let it dry in the sun.

Now I have this textured piece of stiffish fabric. I was planning to layer it with batting and a backing of some kind, then stitching all over it. Then maybe some paint? And I was wondering if getting out the burning tool and applying it to the edges might make an interesting finish...
Wednesday, July 25, 2012
Walking on the Wild Side
 |
| Since I have a bunch of funky yarns (don't you just love the one with "cocoons"?), I laid a few on a small piece of the glued muslin. They immediately reminded me of an underwater reef. Hmmm.... |
 |
| I took the stringy yarn and covered it with wax, using some of the individual yarns to make these cool spirals. And this is as far as I've been able to get with this piece as it seems the 'real' world has other plans for my time at the moment. |
Monday, July 23, 2012
Give Away for August's Technique of the Month

As promised, here is the post announcing the give away of Lisa Kerpoe's new book, Visual Texture on Fabric. Please leave a comment on this email by 8 AM on July 31. Leave a second comment and link if you tell others about the give away on your blog. My personal random number generator (my husband) will pick a number and the book will go off in the mail to some lucky reader that day.
AND EVEN MORE EXCITING NEWS!!
Lisa is a reader of the Fire blog and when she saw we were doing resist techniques in August and giving away a copy of her book, she volunteered to start off the month with a guest post. We of course said, "YES, THANK YOU VERY MUCH!" to that offer!
Sunday, July 22, 2012
A Fabric of Rememberance
Here is my finished cloth paper. It is about 1/2 a yard long and the width of the bolt.

I started out with unbleached muslin which I painted with a glue/water solution. I then placed rose petals from off my ex-husband's grave.


Next was the tissue paper on which I wrote my feelings regarding my ex. By the end I was able to give to him the same thing I hope for--acknowledgement that he did his best. A word of warning here as far as technique goes--wet tissue paper is very fragile so don't brush over and over the same area. I don't know if you can see the texture. Since I skipped the crunching and drying stage that Rosalita began with, my texture is less pronounced and is caused primarily by the tissue paper.

Next was some rose gold paint. I applied it while the cloth paper was still wet but remember that tip about fragile wet tissue paper. Next I liberally sprinkled with some clear glitter.

I was worried the paper cloth would take forever to dry but in less than 24 hours it was dry and ready for ...something. The process took less time and effort than dyeing fabric or many other surface techniques. I am not sure where I will take this piece of fabric yet but it is a beautiful beginning for something.
This is a technique that I think is worth further investigation and I hope to play with some more. Here are a couple of detail shots.


Thursday, July 5, 2012
A Work in Progress
The idea of using diluted glue to stiffen and add body to drapy fabric appeals to me as I do a lot of landscape art quilts and am exploring less traditional methods of achieving dimensional qualities in my art.
More on this piece to come!
 |
| Here's my dried, glue-treated muslin. This is about a yard and a half, all nice and crunchy! |
 |
| Rosalita photographing her treated fabric (please disregard the studio chaos!). |
 |
| After chopping off a hunk of the muslin, I laid it out to contemplate just what I wanted to do with it. At the right are my strips of white tissue paper and a container of the diluted PVA glue. |
 |
| The existing wrinkles were suggesting tree trunks, and I decided to follow that idea to see where it would lead. Additional wrinkles were called for, so the fabric was re-wet with the glue solution and scrunched up some more. |
 |
| In this next step I'm applying tissue strips to add more body to the piece as well as more texture. These I glued randomly, adding wrinkly texture as I went. |
 |
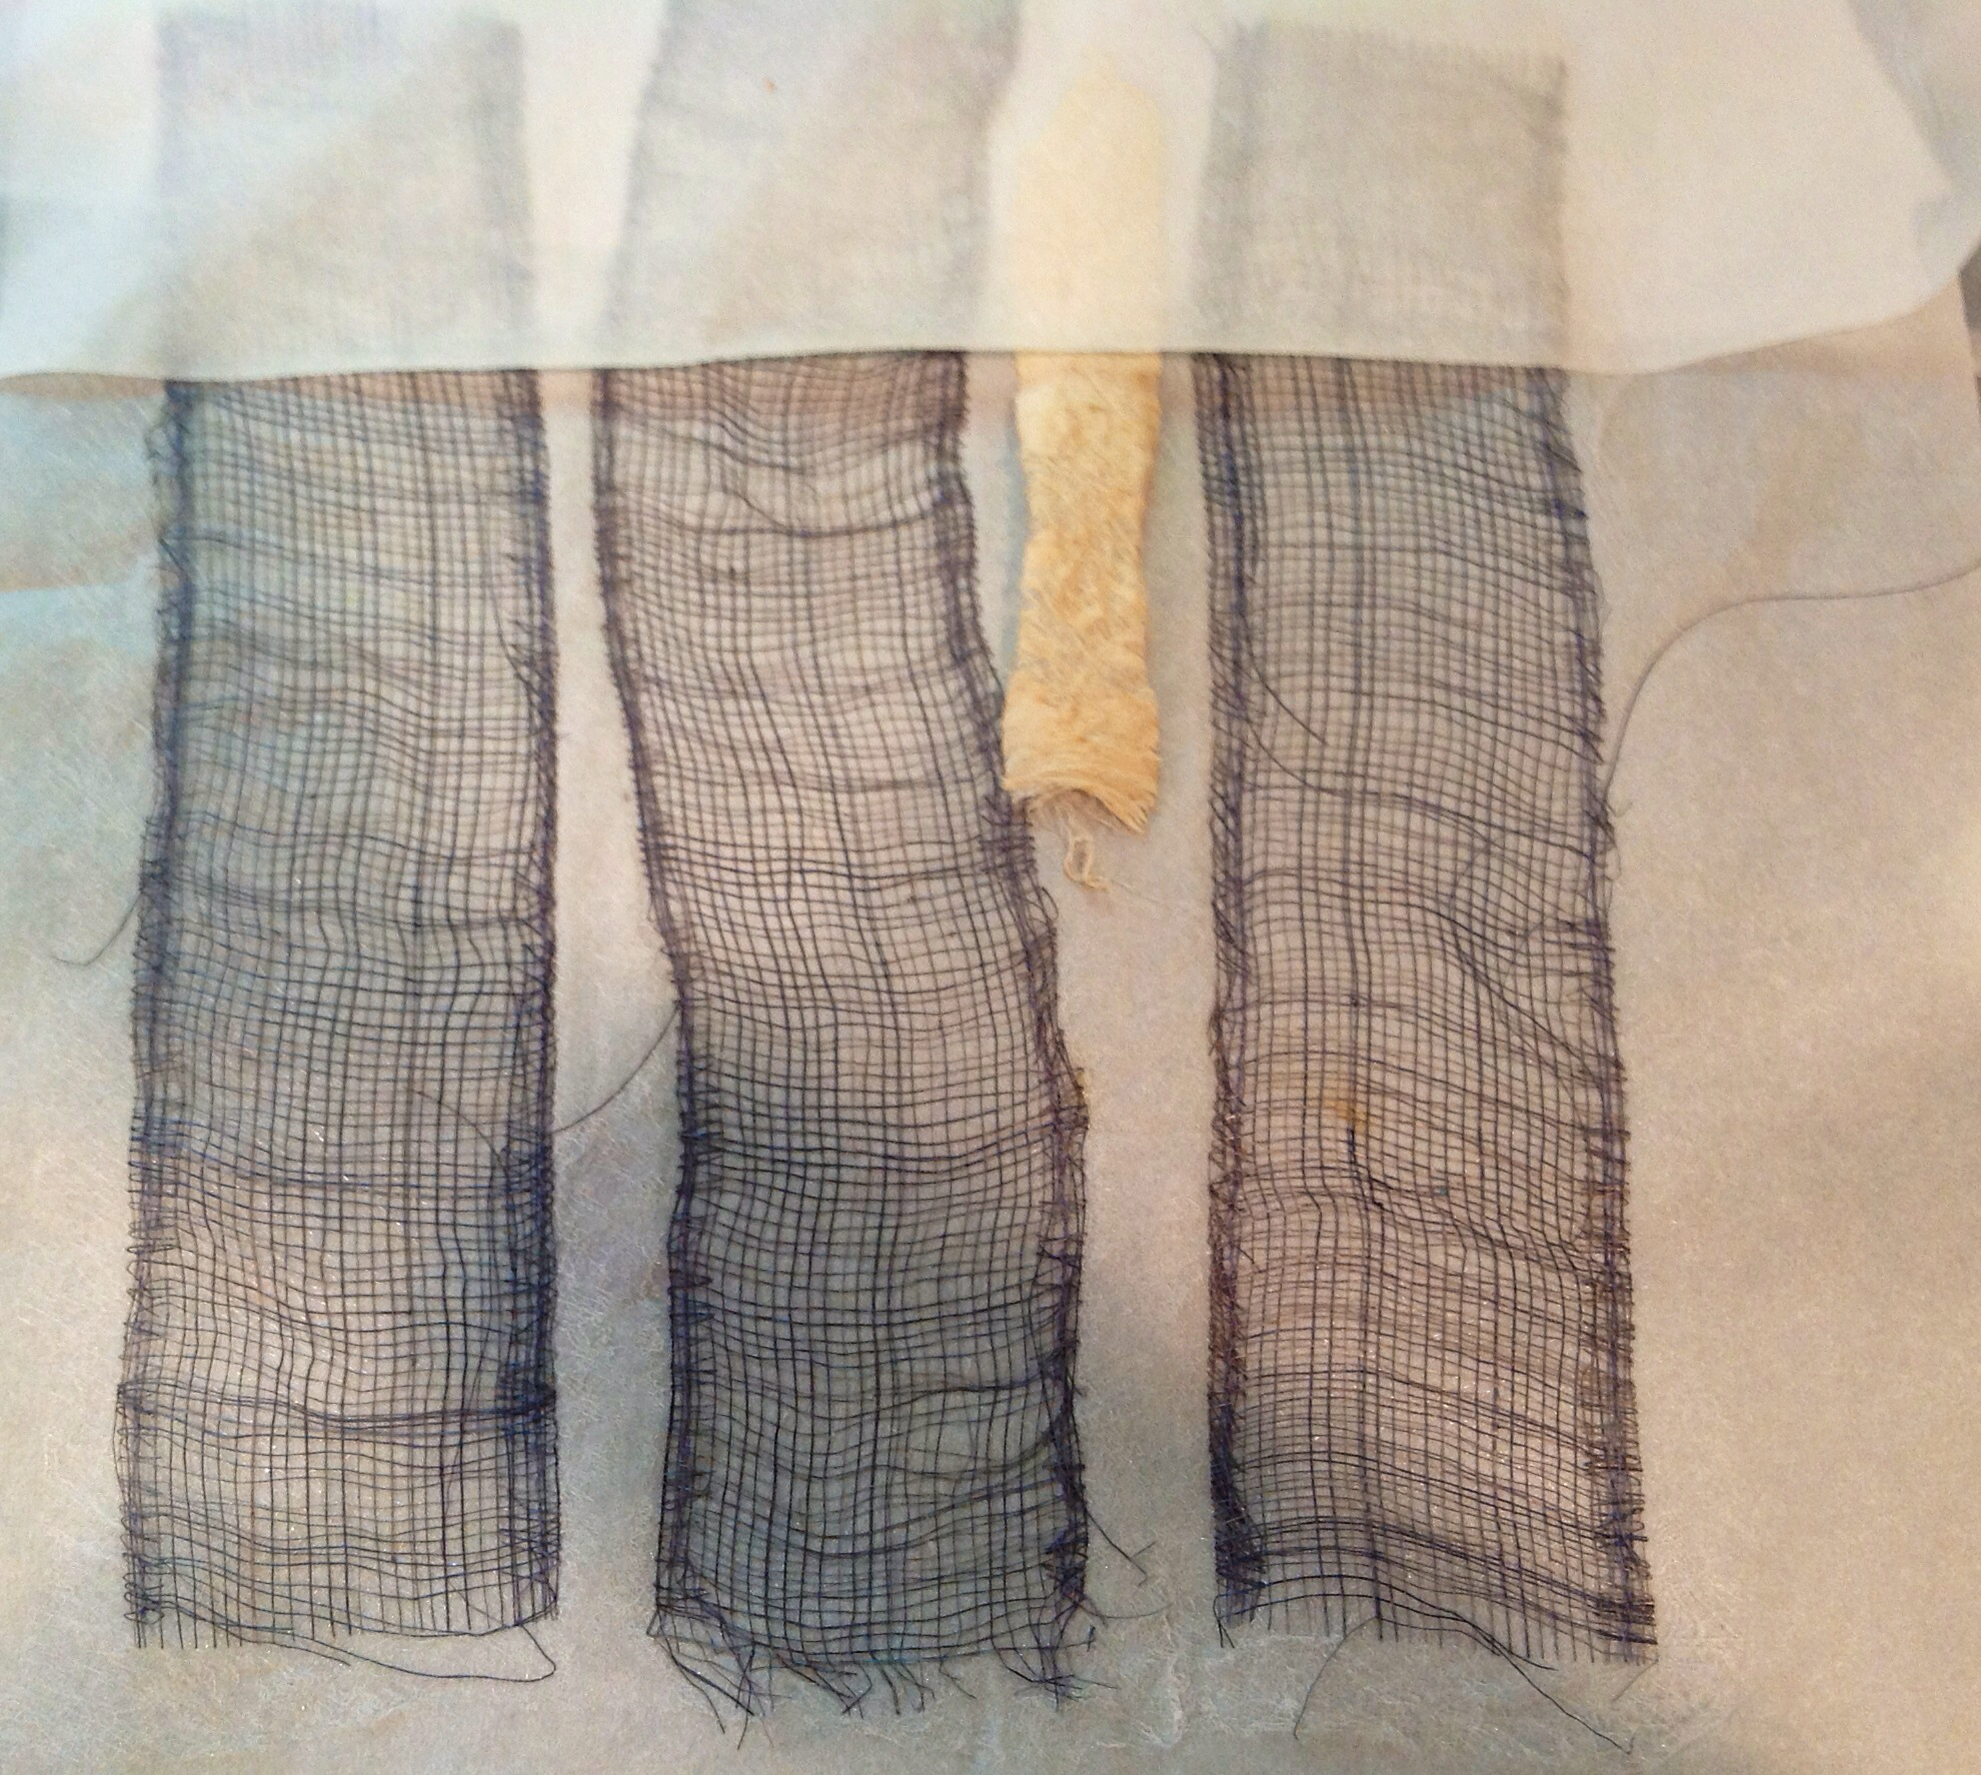
| Detail of the first layers of cheesecloth. |
 | |
| Here I've added some funky strings and yarns in groups. I wanted these to emphasize the trunk/wrinkles as well as for the wonderful textures they impart. Some of the groups I twisted and others were laid flat. Even though these were glued to the surface, I added machine stitching to hold them in place as the glue didn't appear to adhere them well enough. It was a bit difficult to sew with the ridges, so I took off the sewing foot and slowly guided by hand. |
More on this piece to come!
Tuesday, July 3, 2012
A Memorial Series
My ex-husband died last week. It has been 20+ years since we lived together and 10+ years since we have been divorced. However, a divorce does not end a relationship as much as changes it. For better or worse, we continued to be connected by our 7 children.

I thought I would use this month's technique to work out some of my sadness and grief and anger over what could have been but wasn't. This is only a beginning but I am writing stories about my ex-husband on the tissue paper. First I will write about the things that he did during the last 40 years that I have not yet forgiven. Then I will write about how angry I am about the things that could have been and weren't. Hopefully I will be able to end by writing some fond memories and acceptance of our lives that will bring a peaceful closure to our very turbulent relationship.
That is my first step in trying Rosalita's paper cloth technique. When the tissue paper is full of my writing, I will tear it into pieces to glue it to the muslin. It will become a nice background for ... I don't know yet. I think perhaps several small art works to give as a remembrance.
Orange Stripes Redux

After I last posted on this blog, I was unhappy with my piece and received lots of good advice.
I mostly decided to stop taking myself so seriously.

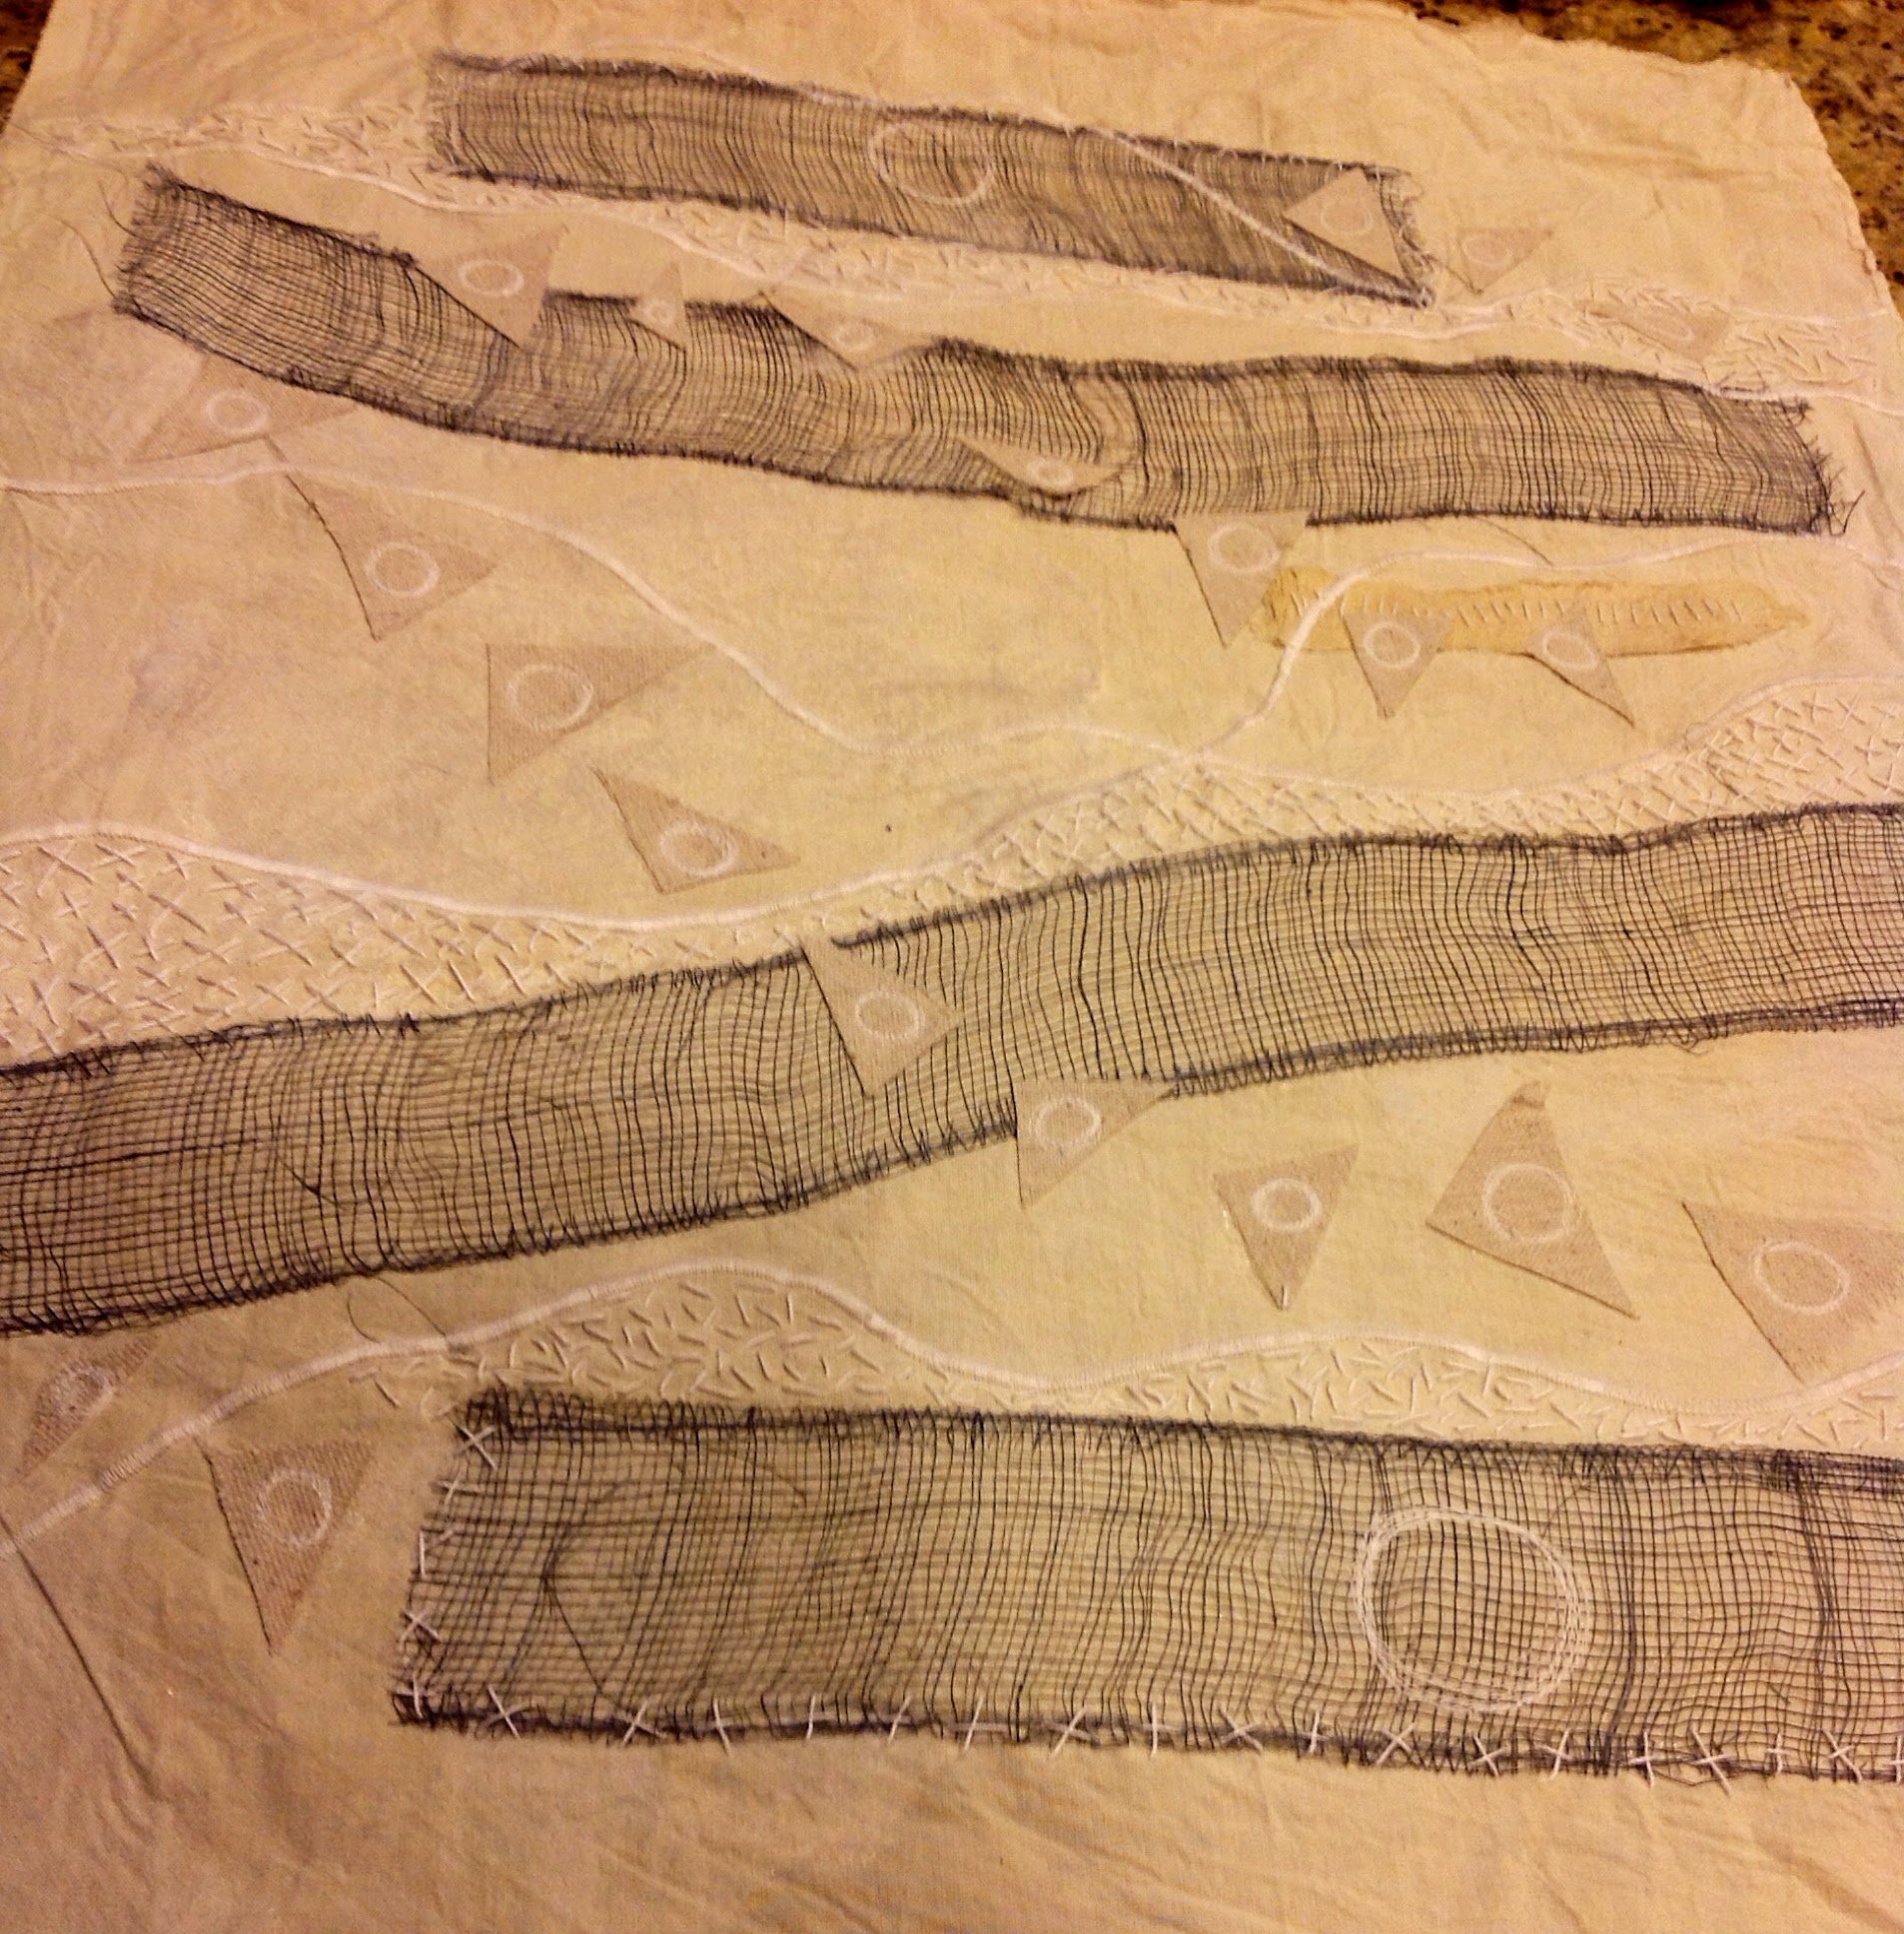
I had another piece of the monoprint/resist-stenciled fabric that was similar to the first piece I used for this technique. I laid one on top of the other and started cutting.

I had a computer blow-up during the weekend, but I found the photos I took of my cutting and stitching of the pieces (Mr S said they were there...I just had to find them).

After a bunch of slicing and dicing, I wound up with these two pieces. I sewed them together into one piece. I wasn't real careful with my stitching, so it isn't real flat -- there are some tucks and small gathers.

I still had the pile-o'-turquoise out because I thought it would be the best. But a little strip of orange (yes-- orange again!) was sitting out left over from a stuffy I made for my daughter this past weekend.

So I added it. And I liked it. So I cut some friends for it. And added them. This time I used skinny strips. And what a difference!

This is where it stands. It's about 19 by 14 inches. I rather like it like this -- I'm inclined to leave it here. Any suggestions?
Should I quilt it? Add some paint? Just enjoy it as art cloth? Or add (gasp) some more strips?
Subscribe to:
Posts (Atom)