A TECHNIQUE DRIVEN Blog dedicated to mastery of surface design techniques. First we dye, overdye, paint, stitch, resist, tie, fold, silk screen, stamp, thermofax, batik, bejewel, stretch, shrink, sprinkle, Smooch, fuse, slice, dice, AND then we set it on fire using a variety of heat tools.

Sunday, September 30, 2012

My Turn At Dye Painting

Well, it took me the whole month but I finally got a chance to try dye painting.


 Here is the picture of the daylily that was an  influence for the first picture and here are some progress pictures.  I used a yard of fabric ripped into 4 pieces.  I drew an outline using charcoal because I thought it would wash out nicely.


And here is the fabric washed out, dried, and ironed.
I tried a second floral picture.
 
I thought I would love this technique but not so much.  That was not the technique's fault but my choice of subject.  I tried painting in a more realistic style and I don't like the constraint of doing that.  I made a bad choice.  Since  I was tired of trying to draw pictures  I just dumped the dye out of my little containers and just spread it around.  Frankly,  I can only handle trying to be controlled and close to reality for so long before I have to rebel.   I liked the result so much that I spread a second piece of fabric on top of it and to make a print of the original.  Here they are.
THAT IS MORE LIKE IT!

Monday, September 24, 2012

WE ARE IN QUILTING ARTS MAGAZINE THIS MONTH


I had to fidget to try to get the article big enough to read. I know it looks stupid but the choices for sizes of the images are limited so lets just be happy with this. The article is in this months Quilting Arts Magazine starting on page 72. "WE" appear on page 75 - "Virtual Connections" about Five, the original 5 members from Maine who started this blog: Judith DeMillo Brown, Beth Berman, Rosalita Feero, Kathy Molach and our only none computer member, Charlene Huntly. This blog has grown over the years becoming the robust site which has had contributing members from all over the US, one from Canada and now Neinke Smit from the Netherlands.

I know this MAY be hard/easy to read but I DID want people who do not get Quilting Arts Magazine to be able to enjoy the article about the blog creators.


Sunday, September 23, 2012

Painting with Thickened Dyes--Quilter Beth


I finally had a chance to try painting with thickened dyes this weekend. I have to say up front that I am NOT a painter in any way shape or form. That will become abundantly clear after you see my attempt at this technique. It was VERY intimidating to try this technique after seeing the beautiful work of my fellow resident artists. 

I looked through my sketch/idea book to come up with a drawing I could paint. This drawing was inspired by photographs I took at an exhibit of Chihuly  glass. I LOVE the flow of the molten glass and tried to capture that in my piece.  According to the tutorial, the thickened dye should stay wet so it can batch properly. That was the hardest thing for me; I’m sure it didn’t stay wet. I tried to cover it as I went with small pieces of plastic, but that was next to impossible for me. 

I let it batch overnight, and this is my rinsed and dried piece. I guess not keeping it really wet didn't make a big different in the end, because the piece kept great color. I'm hoping with some quilting and thread painting it will be something I can use.
 I wanted to test the colors on a piece of cloth before I painted anything, so I used this next piece for testing and cleanup. (It was soaked in soda ash first.) It isn't great, but I did find that I LOVE the texture the wrinkled fabric and paintbrush made. I will be trying that again with a more controlled color palette.
I’m glad I tried this technique and now have it in my arsenal of tools, but it is not one I anticipate using frequently. I find that I have much better control (and WAY less mess) when I color a drawing on fabric using fabric paint.

Lesson 1 - don´t use too much water

Ok, my turn, I saw a landscape with tree in a painting-for-dummies book (see right), and managed to mix exact the right colours with just yellow/turquoise/red procion powder. Yeah, so far so good.


Set up the table, and felt like a real artist, painting my landscape:


Happy with the final result:

Ready to add a tree by machine, but wait a minute, I had to rinse and wish it first:


Oooph, that´s not exactly what I hoped for, although there is a misty sun glaring at the horizon ;-).
Lesson learned, I mixed the original thickened procion paint with too much water to work like an aquarel.
Better not do that. Just use the original paint, and you will not loose the colourdeepness.
Fortunately, I did some printing with the remains, so I can prove that pure thickened procion can stand the rinsing/washing if used properly;-):


Have to retry this, it is big fun to do!

Thursday, September 20, 2012

Dye Painting Stuff from Karen


I took a class with Hollis Chatelaine a few years ago and did this picture of my daughter and our dog.  I like it, but I never finished it because I wanted to make it bigger and never could decide how best to do that.

Hollis had me mix the dye for my daughter's skin darker than I would have, assuring me that "it will come out much lighter than you think."  She was right about that.  But I hadn't really worked with portraits and/or pre-mixed dyes much.  I'm not crazy about DD's eyes, but Hollis assured me that a lot can be "fixed in the quilting."

Lately, I have been working on a series of quilts for a show this winter with Madison Contemporary Fiber Artists.    This was painted with thickened dyes on cotton.  I just finished the quilting.  I used a bit of foil over MistyFuse to make the beetle shiny.


And this is the fourth piece in the hibiscus series.  I mentioned it here earlier -- here is a link to the process: http://cre8tivekick.blogspot.com/2012/08/tell-all-scoop-on-resistdye-painting.html

I used a flour resist and painted the thickened dye over it.  Again, I used the foil thing for the beetle.  

Monday, September 17, 2012

Nasturtiums - after laundering

After laundering, I would say there was very little fading, which is good.  I think I will try to use a larger brush for any future pieces for the shading... the areas around the leaves and flowers look sloppy to me next to the areas where I used the larger brush to extend the background colors.  And I'm not sure I will do any more to this, although it would be a good candidate for doing some free motion stitching to add details.  All in all, this is a good technique and I'm glad I gave it a try,  I can't wait to see what the rest of you do painting with thickened dyes!

Sunday, September 16, 2012

My dye painting experiment

I have used thickened dyes in various ways for the past few years, but I think this is the first time I have tried using them for a realistic rendering.  Years ago, I painted with acrylics and enjoyed the process, but I haven't done any painting for over 25 years, so this was something I wanted to try.  For a subject, I chose a photo I took of a Nasturtium plant that grows in a pot on my deck:

First I did a line drawing of the flowers. 
Then I mixed my colors: Deep Orange, Golden Yellow, Light Lemon Yellow, Bright Green to start.  Later I added Robin's Egg Blue, Bronze, Moss Green.

I began by painting the veins in the leaves with light lemon yellow, then used deep orange and a little golden yellow for the flowers.
Next, I painted the leaves using bright green with some thickener to give me lighter shades, and some moss green for the darker shades.
I let the piece rest overnight, covered with plastic.  Then I used robin's egg blue in 2 shades to try and create shadows in the background.  Big mistake!  No way to paint it out, so I deal with it later.  Meanwhile, I used Moss green and bronze to paint the background around the leaves and flowers.
Up until now, I was using a number 2 Bright paint brush, which gave me a good crisp line, and it was a good size for the details.  At this point, I began to use a number 12 Bristle Flat brush to extend the background.  While I was at it, I painted over the blue stripes... the best I could do to camouflage the stripes.  Note to self:  be very sure of what you want to do with dyes!  If I were painting with acrylics, I would simply paint over them and no one would be the wiser!
I'm sure there is more I could do to this piece such as adding details with a fine point brush, but I think I am going to stop here and digest what I have learned.  One thing I noticed was that I had varying thicknesses of dye, partly due to using other recipes than the one Kathy used.  But I found that mixing a thinner batch into some that were thicker than I wanted helped to make them easier to use.  Now my only concern is how well this piece will handle being washed after a thorough batch.  I'll post an update after it's washed out, so stay tuned...


Saturday, September 8, 2012

Sugar Syrup revisited

Sorry Kathy, to interrupt your series with my final results of the sugar syrup of the August experiment, but I am too happy with the final results to leave them in the cupboard without sharing.
And after all, it is painted with thickened dyes, which makes it a bit more acceptable perhaps ;-).


I left the self-made sugar-syrup in the refrigerator for another 2 weeks, without covering, and it got nice thick and still clear... So I used it in printing with kitchen-stamps on the PFD fabric:
This a glass-print:


After one day:


And I printed with a plastic cover, a cork, and a baking form:

 
Painted with thickened procion dyes, including soda-ash:
 
 
Sprayed it a little with water, to facilitate the batching:


It´s magic seeing the sugar crystals pop up:


After two hours batching, rinsing and ironing, I was very happy to see the results:


I will make myself a nice new agenda cover for the new year!


PS. all the other sugar syrups didn´t work for me, please check my blog in dutch, the pictures will speak for themselves ;-).
http://verfvirus.blogspot.nl/2012/08/nog-een-keer-suikerstroop.html
http://verfvirus.blogspot.nl/2012/08/limonadesiroop.html
http://verfvirus.blogspot.nl/2012/08/schenkstroop.html

Ok Kathy, now I´m ready to join the new September experiment!

Tuesday, September 4, 2012

More Dye Painting and How to Finish the Process

I've found that painting with dyes is a zen-like process.  Just watching what the colors do as they're laid down is fascinating.  And the brain-twist of making certain that I don't revert to classical painting techniques of layering light over dark, etc. certainly keeps me engaged.  Hours pass within minutes!

This painting of hosta from my garden presented quite a challenge in working with so many variations of the same color...warms and cools for highlights and shadows; keeping in mind that I'd be thread painting over this so I didn't need to put in tiny details; adding the subtle tones of shadows where the leaves ripple that I wouldn't be able to duplicate with thread.  

Here I've layered the painting with backing and batting in preparation for thread painting.  I use Thermore batting which is thin and dimensionally stable.  Warm & Natural works very well, too.


The finished hosta painting.  Note the lower right corner where I used a medley of black and green shades to create the sense of plants beneath the hosta leaves.

Oops.  Need to change the orientation!  However, you can see that I've begun thread painting here and that the amount of depth this adds, both texturally and through color and contrast, is beginning to bring this painting to life.

Detail of thread painting
Batching and Finishing

As you paint sections, place small pieces of plastic over each section to keep it wet.  If you need to leave the painting for any length of time, cover it completely full a full sheet of plastic to keep the air out.  Always make certain that the dyes don't dry out. 

Once the painting is complete, again cover it with the full sheet of plastic and let it 'batch' in a warm place.  I've put mine out in the sun, or left it near a heat source.  Fully covered, it won't dry out.  After 12-24 hours (depending on your level of patience), remove the plastic and wash the painting in hot water with a small amount of synthrapol.  Rinse until the water runs completely clear.  Then (this is important...in a later post I'll show you why) dry it with a hair dryer until it's completely dry.  It can also be ironed dry from a damp state.  Voila!  A beautiful painting!


Saturday, September 1, 2012

Painting with Thickened Dyes


Painting with Thickened Dyes

This technique has been on my "wish list" for a long time.  This past May I was finally able to take a class with Hollis Chatelain at a wonderful B&B where all of us were able to spend the entire time devoted to our art without interruption.  Heaven!  

Although my tutorial covers primarily detailed representational painting, thickened dyes are also fabulous for free abstract painting.  For purposes of this blog, I'll be working fairly small--fat quarter size or smaller. 

Here's what you'll need for supplies:

This shows several choices for mixing the dyes:  2 different palettes and some small containers with red lids.
Procion MX dyes (3 primaries and black are an absolute minimum)
Print paste - mixed  (I use the ProPrint Paste SH formulation from Pro-Chem)
Palette/small containers for mixed dyes
Brushes:  Synthetic nylon (white shows the colors better than tan) in various sizes (1" and 1/4" flat; #1, #4, #6, #8 round; angle)
Outline drawing enlarged to desired size

Reference photo
Hair dryer
Waterproof substrate on which to stretch treated fabric for painting
   I use a sheet of foam core with a sheet of plastic stretched over it and taped on the back.  Make sure to have NO wrinkles on the stretched surface, as these will be translated into your painting.
White or clear plastic bag (garbage bag or shopping bags are good) cut into small 3-5" pieces.
Colored pencils in colors of the major elements of your design
A sheet of clear plastic without folds or texture that is slightly larger than your fabric
Container for water for rinsing brushes
Rubber or latex/nitrile gloves
Apron
Use a Sharpie to make the outline thick and dark.
1.  THE DRAWING should be a dark outline of the desired size for your piece of art.   Small drawings can be enlarged by  1) scan drawing into computer and resize in a graphics or photoshop-type program, then print out using "poster" setting in your printer.  This will give you a drawing which is spread onto several sheets that can then be taped together to form the whole drawing.  2) use an overhead projector to project the image onto a wall where the drawing can then be traced onto paper. 

2.  THE FABRIC:  100% cotton PFD pretreated with soda ash solution and allowed to dry completely.  This will be the 'canvas' for your painting.  Lay this flat to dry and stretch and pat to remove as many wrinkles as possible.  The dry fabric can be ironed, but care must be taken when doing so to not use too high a heat.  A wrinkle-free surface is much more enjoyable to paint.

3.  PRINT PASTE is the medium in which the dye powders will be dissolved.  The consistency should be a bit thinner than honey.  Too thick and it will not spread well; too thin and it will be difficult to control the brush load of dye.  Mix until all powder is absorbed, then allow to thicken for about 30 minutes before use.

Instructions
1.  Tape the outline drawing to your substrate, then tape the treated and dried fabric over the drawing.  Using the colored pencils, lightly trace the drawing onto the fabric.  Make the lines dark enough to see, but not so dark that they'll show through the transparent layers of dye.  These are reference lines for your painting, so use colors that correspond to the subject (red for red/orange/pink petals on a flower, for instance).
2.  Once your design is traced, remove the drawing and tape the fabric to the substrate. Make certain to stretch the fabric as much as the tape will allow to remove those pesky wrinkles.
3.  Mix your chosen colors with the print paste.  Use 1/4 tsp of dye powder for about 2 Tbls of print paste mixture.  Mix thoroughly.  
4.  Have one container of colorless print paste.   This will act as your thinner for the dye colors should you want a lighter tint.  Black can be mixed with colors to make darker shades.
5.  Once all your colors are mixed, paint a sample of each on a scrap piece of fabric.  This will allow you to know how the dyes will look on the fabric.
6.  As you paint areas, use the small pieces of plastic to cover your work.  It's important that the entire painting remain in a wet state in order for the dyes to 'batch'.  Continue covering each area as you go.  I use clear plastic for this as I like to see my work underneath to reference the colors I've used along the way.
7.  Use the palette or a small plate for mixing shades for smaller areas.  As you become more comfortable, it's possible to mix one color into another directly to one side of container.

Note  of caution!
Dyes do not behave like traditional painting mediums such as oil, watercolor or acrylics.  Painting with dyes is a bit counter-intuitive in that the first color that you lay down will be the color that appears on your final painting.  So if you want a light shade or a highlight, lay that in first.  Then proceed to the darker shades.  Clear print paste can used to shield the white of the fabric somewhat.

Maintain a wet edge when painting larger areas.  This will allow the dyes to flow without making a hard edge or line.  Paint large areas in one sitting to avoid these hard edges.

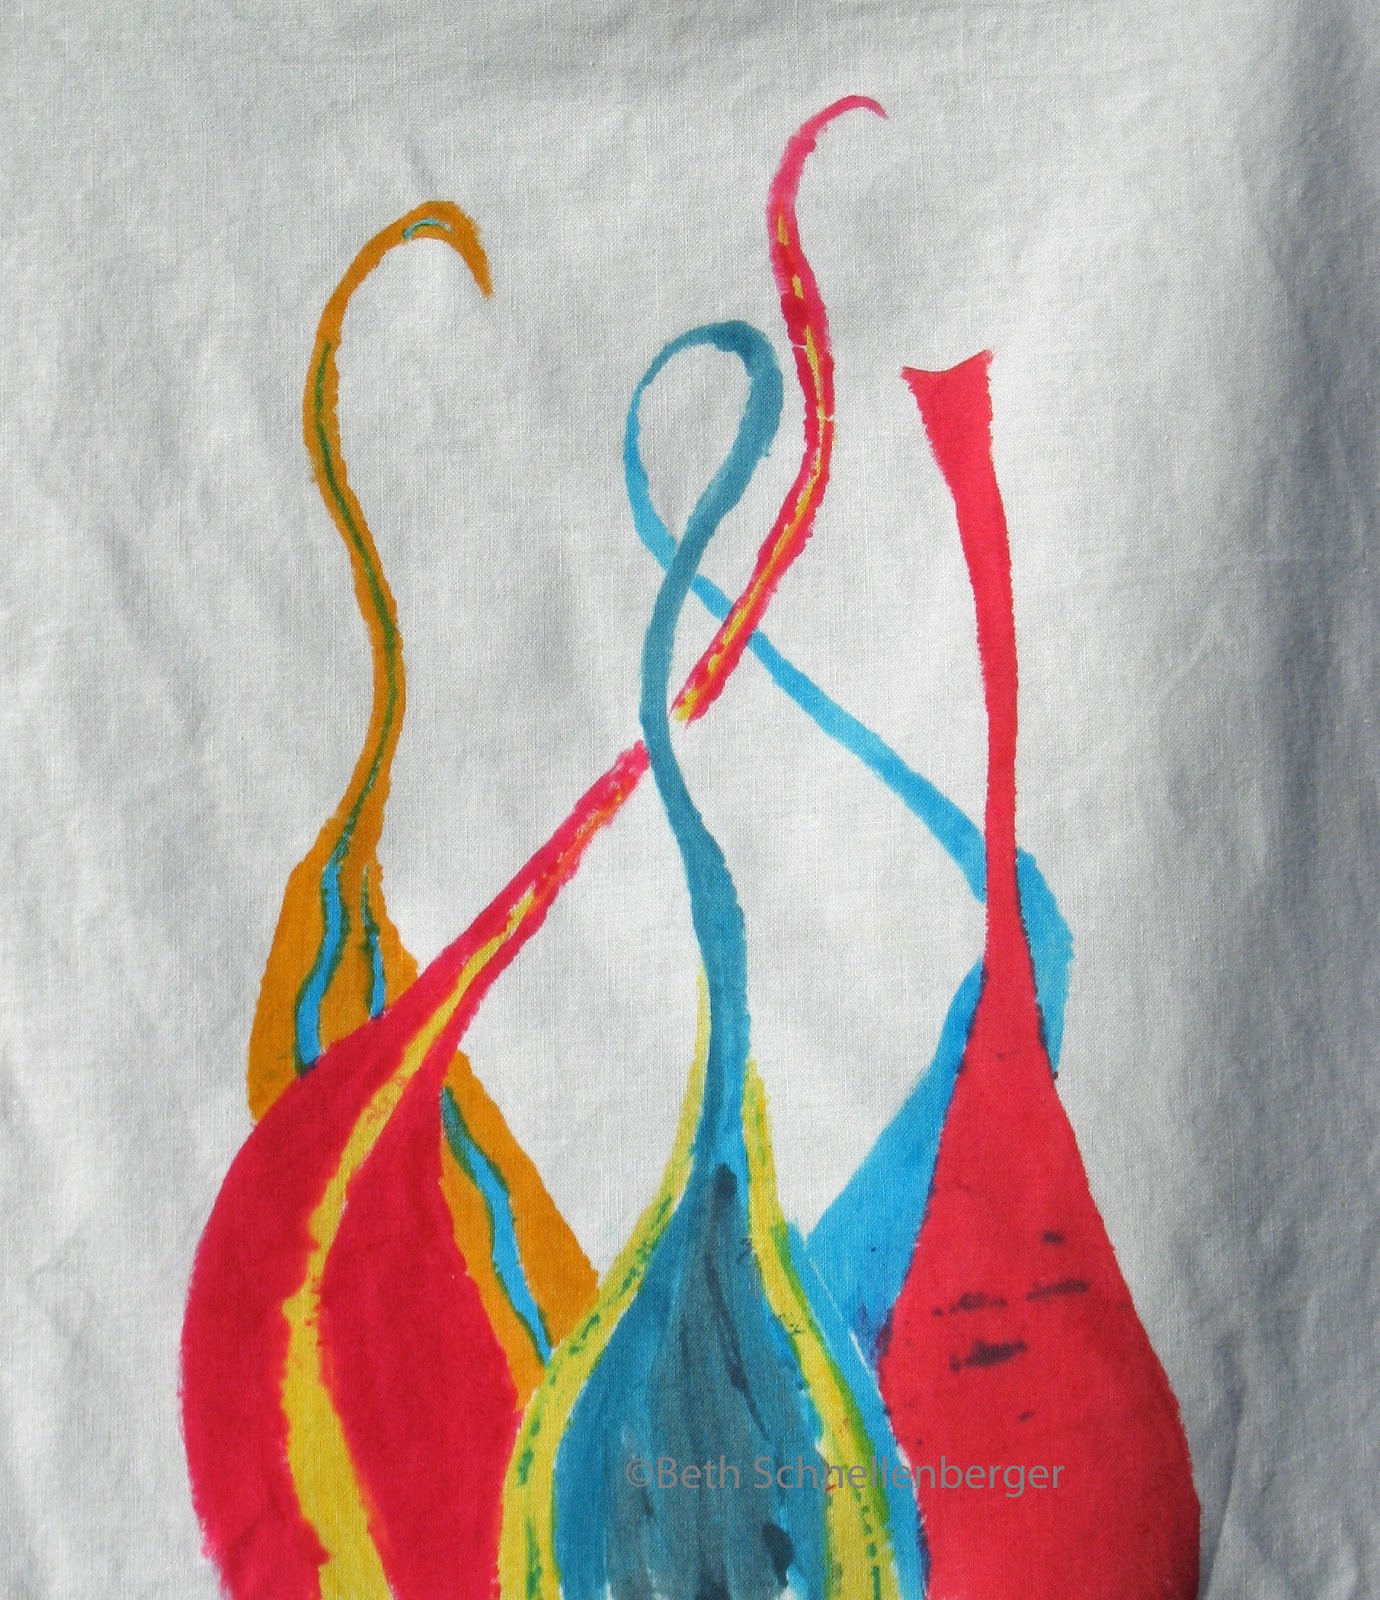
This is one of my experimental pieces
The bud and green stem at the bottom were painted using thinner print paste, and they diffused more into the fabric.  This might be a look to exploit, but it is difficult to control.

 This lily is one of my finished paintings and is awaiting thread painting.


Here is Hollis Chatelain with her quilt "Innocent" (aka Ernest).  The size and scope of this painting in person is mind-boggling!  If you look closely, you can see some of the 37 children that she's quilted into this portrait.

I'll be posting more this weekend.  Blogger is giving me warning messages that there are errors and my post isn't being saved...I'm hoping that isn't the case!  In the meantime, hope that you can start on a painting of your own.