A TECHNIQUE DRIVEN Blog dedicated to mastery of surface design techniques. First we dye, overdye, paint, stitch, resist, tie, fold, silk screen, stamp, thermofax, batik, bejewel, stretch, shrink, sprinkle, Smooch, fuse, slice, dice, AND then we set it on fire using a variety of heat tools.

Sunday, February 24, 2013

Scrunch Dyeing in a tray

My turn, I would like to share a piece I made in december. This is the dyeprocess in pictures:


I decided to use this piece for a small project. Ironed fusible web over the full piece, cut a line drawing of sun flowers out of the piece and added it to a sort of 'crazy patch' top, dyed with the same colours.


No rocketscience, not an artquilt, but a lot of fun to do!!


Wednesday, February 20, 2013

Scrunch Dyeing – a few examples and more borrowed plumes


I don’t have too much experience in scrunch dying. This is of course my fault. So trying to mend this gap i’ll try to adorn myself with borrowed plumes ...  
To keep it in line, first my few examples.
Though I dye all my fabric myself, I do mostly solid colours. My older scrunch dyed fabrics ended up sewn as dresses.
Here is one which a friend of mine streched as a colour panel for her wall.
I did some new scrunch dyeing this month, using not only monochrome or analogue colours but the whole palette: mixing red, bright orange, sun yellow, intense blue.
Here is one with intense blue and bright orange.
What interested me more, to make a nice scrunch-dyed fabric with pale colours. I found dyeing pale colors much more difficult as strong ones and apparently I still have to work on the right dosage.


And here are my ice-cube scrunch-dyed fabrics. During the process

and the results


The blue became very pale and though I used mixing red (a slower red) it still turned out too close to fuchsia. The results both in the blue and in the red, I think have to do with the cold.

And now the borrowed plumes: They are from my friend Heide Stoll-Weber who is a magnificent dyer and who’s beautiful fabrics are very sought after, at least here in Europe. I asked Heide for some examples, how she uses her multicolored, scrunch-dyed fabrics.
First five quilts of her older series, Sprituals. They are machine-pieced and embroidered with seed-stitch with hand-dyed embroidery floss.


They are beautiful examples to use these fabrics. If you would like to see more of her recent work here are some pictures of her latest exhibition.

Thanks for reading it and I'm happy to hear your comments.

Monday, February 18, 2013

Scrunch Dyeing - finished project

I decided to use some of my fabric from my scrunch dyeing experiments in a free-form art quilt.  I combined some of the fabrics with some other hand dyed fabrics as well as commercial fabrics from my stash, and created some strip sets and blocks.  After auditioning several combinations on my design board, I settled on a grouping, stitched the top, then got inspired to try doing a little embroidery to embellish the middle.  I generally use lead pencil to sketch designs on my fabric, but thoughtlessly grabbed a graphite pencil and ended up with a smudged mess!  So I decided to complete the quilt, then launder it to remove the smudges, and I am so happy I decided to do that!  Ordinarily, I use fusbile interfacing to create my art and landscape quilts, but in this case, everything was done with stitching, so it was possible to launder the piece, creating some wonderful textures!  Afterward, I used a lead pencil to sketch a vine on the middle strip, and added some embroidery to the square on the right top quadrant, enhancing a design that came from dyeing the fabric with a portion wrapped around a button with a daisy design.  Okay, enough words!  Here is the project:
I used free-motion quilting on the border, the upper right square and the lower left square.  The rest was 'in the ditch' quilting.

Closeup of the flower - the design was very faint without the embroidery embellishment.


Closeup of the scrunched square with free-motion quilting.  I am calling this piece 'Tribute', in honor of my Mother, Step-Mother, Grandmothers and Great Grandma, all of whom were inspirational to me through their talents in various fiber arts.  I hope this will inspire you to not only try the dyeing techniques I demonstrated here, but also to use the fabrics you create.  One thing I have learned is that they look much better in projects than they do in my storage boxes! Thanks for reading and participating in the discussions here!

Saturday, February 16, 2013

My Try at Ice Dyeing

I finally had a chance to try some ice dyeing.

Here is my set up--I used two small containers (I only show one in the picture.) in which to scrunch fabric and one big container covered with a grid. I placed two fabrics in the big container under the grid and placed the remaining fabrics on top of the grid. Then, I covered the fabrics with ice I purchased at the store and sprinkled the ice with powdered dyes. Here's the setup...
Here are two of the fabrics before dyeing. The piece on the left is a "wipe-up" rag. The fabric on the right is an OLD calico fabric that I really hated. I thought any kind of dyeing could only help this poor "dog."
Here is what they looked like after ice dyeing. The fabric on the right was one of the fabrics placed under the grid for dyeing.
These are some commercial fabrics I wanted to experiment with.
After dyeing...
This is a flour-paste resist piece before dyeing.
This is after dyeing. This fabric was in one of the small round containers. I used fire engine red, rust orange, and bronze dyes.
Another piece of flour-paste resist before...
And after... This fabric was in one of the small round containers. I used rust, bronze, pumpkin spice, and golden yellow dyes.
This is the only "plain" piece I dyed. It was one of the fabrics under the grid.
I like the results, but I didn't get that "crystal" effect I like so much. I think there are a couple of reasons for that. I wanted to see what difference it would make to use dry fabric to start with, so I used fabric I had preciously soda soaked and dried. The other reason might be that the ice I used was not really small. There were big chunks of ice rather than small cubes. (I think I read somewhere that that might make a difference.)

Friday, February 15, 2013

Better Late than Never Right?

I know I'm coming a bit late to the party with this one but since it uses two things taught on this blog recently, I just wanted to share what I made using those bits.

Recently I came across the phrase "Intuitive Design". Don't know what it means to anyone else but I chose to just take a piece and see where it lead me.  The background is on a small piece of silk velvet dyed purple (or painted - I'm not sure as it was a gift). Then I just started grabbing things and auditioning them and moving them until I liked it.  No pre-set plan or goal...just fun. Only thing I knew was that I wanted to play with some Extreme Texture!

I had done some of the 3-D polyester using the technique posted by Nienke in October
(link: http://andthenwesetitonfire.blogspot.com/2012/10/3d-shibori-on-polyester.html)
It was great and I loved the effect but just couldn't think of anything to do with my greenish-bronze polyester.

Then there were some very organically made beads in Beth Berman's posts on Embellishments.
(link:    http://andthenwesetitonfire.blogspot.com/2013/01/bead-organization-and-other-elements.html )
I had some painted Tyvek hanging around, got out my heat gun and went to work.

Finally, I combined all these ingredients (and a few more) and came up with Sour Grapes

Sour Grapes

So as I look forward to a lot more inspiration on this blog and having lots more experiments to play with, I think my version of Intuitive Design will be happening again!

Thursday, February 14, 2013

Jane Dunnewold is Our Guest Blogger for March!

I'm so excited to let you know that Jane Dunnewold will be our guest blogger for March. She will be sharing one of her essays with us. Be sure to check it out on March 1. I think you will find it and her follow-up post to be very interesting.

Today happens to be her birthday. Happy Birthday Jane!

Wednesday, February 13, 2013

Snow dyeing and the melting snow

I used 2 plastic boxes . In the little one I puncture holes so I can optimal use the melting snow.
In the bottom box a piece of fabric is placed and another box is put on the top. The bottom piece of fabric will be penetrated by the melting snow.


Bottom piece

Top piece
 
This what I made whit the pieces.

Tuesday, February 12, 2013

Scrunch and Snow

I thought I would take advantage of Judy's scrunch dyeing technique this month and use it for some snow-dyeing.  

Most of the snow-dying I have seen involves setting up a rack and screen for the snow and dye to drip through the fabric.  I've never done that -- I just let the fabric sit in the soup of melted snow and dye and I have always achieved really interesting fabrics that way.  But I hate wasting dye.  So I thought: what if I folded up fabric and put it under the scrunched fabric to act as a kind of rack and absorb some of the melted snow and dye?  I figured I would get some pastel coordinating fabrics to go with my snow-dyes.  

So I scrunched up fabric on top of the folded fabric (all of it was soda-soaked), added a layer of the powdery dry snow from my front garden, and poured on dye concentrate.  

I brought all of the containers inside to batch overnight.


Of course, I got beautiful snow-dyes.


But the real surprise was underneath.  No pale coordinating fabrics here.  I got some great stuff with light and dark areas.  I think that some of these will benefit from further over-dyeing to really bring the colors together.

I also tried sprinkling some dye powder directly on top of the packed snow.


I really like the results.  And it was much quicker than mixing up the dyes into concentrate, then pouring them on the snow.  I think that the best color is achieved by the folding and/or scrunching of the fabric before adding the snow.  The one in the middle has a nice effect because I loosely folded the fabric in a fan shape, then scrunched the ends.  So for "school nights," when I am pressed for time, this is a great option for me.

Monday, February 11, 2013

More snow dyes

I couldn't resist the fresh, powdery snow outside today, so I dyed some more - a couple scrunches and a couple I did with simple folds.  The first two are the folds, and I used some liquid dyes of undetermined ages.  
I keep them stored in the garage, and they were frozen when I brought them into the house, so I figured I was safe using them!  Here are the folded pieces:
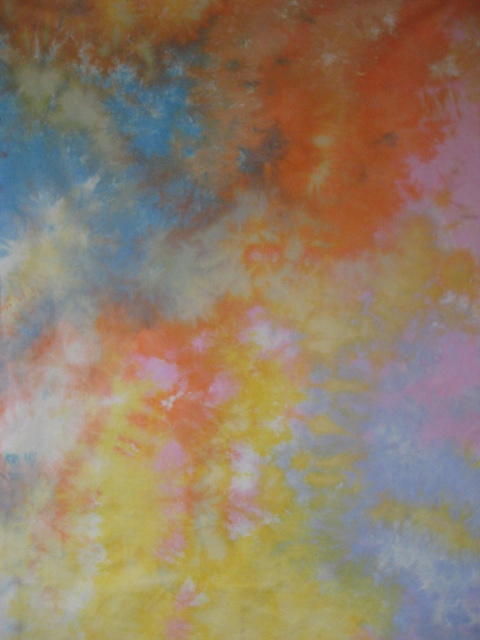
This is a simple accordion fold where I folded the piece in half then accordion folded the double thickness. 

This piece was folded in half, then I loosely swirled the fabric before adding the snow.  Both pieces were placed in a plastic storage bin, then the snow was added, then dyes added randomly using a measuring cup with a spout.  Here's what the bin looked like:
I used Turquoise, Fuschia, Soft Orange, Orchid and Deep Purple on the pieces above.
 Next, I scrunched a couple of pieces of fabric, placed in another container, added the snow, then sprinkled dye powders:
Here is the second bin, batching.

 
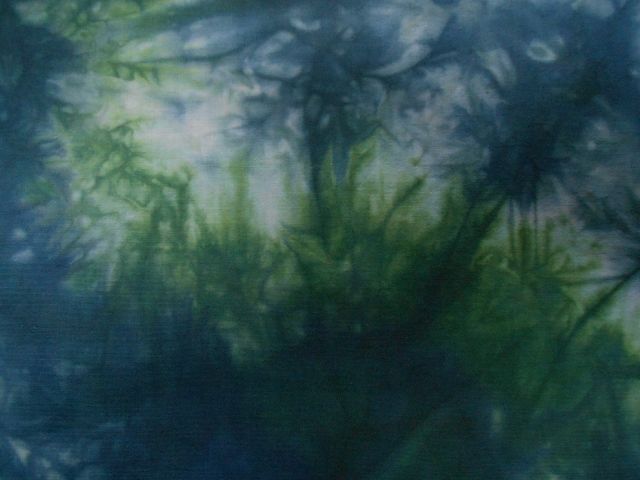
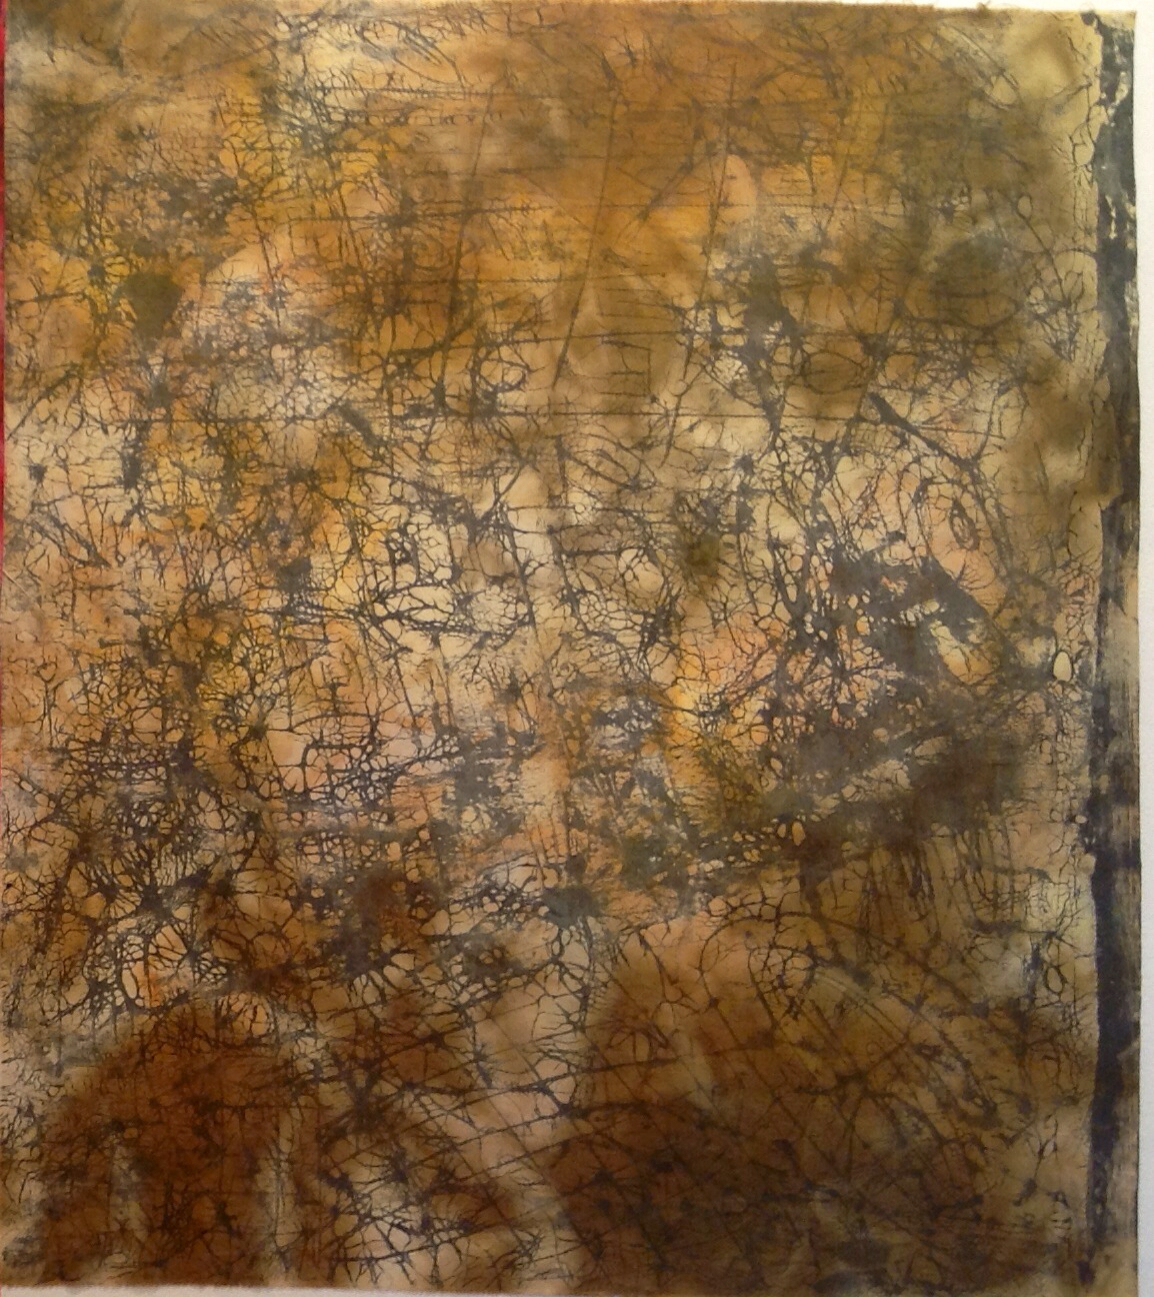
Here is one of the two pieces from the second batch

And here is the second piece.
I used Golden Yellow, Soft Orange, Hot Pink, Robin's Egg Blue and Moss Green on the two pieces above.
I batched both bins for about 6 hours, plenty of time to allow the snow to melt and the dyes to bond to the fabrics.
I have about 4 more pieces of fabric that I plan to snow dye over the next couple of days.  I may do at least one with just a single color, just to see how it comes out.  Normally, I  combine several colors, but I'm in 'play' mode, so can't hurt to try something different!  Oh, and I think I may do a parfait snow dye as well, just to see how it comes out compared to my multi-color versions of single layer dyeing!
On another note, I promised to try and finish a project this month using some of my dyed fabrics from the first couple of posts, and I'm happy to say I am well on my way to having a piece ready soon, so be patient just a little while longer!