A TECHNIQUE DRIVEN Blog dedicated to mastery of surface design techniques. First we dye, overdye, paint, stitch, resist, tie, fold, silk screen, stamp, thermofax, batik, bejewel, stretch, shrink, sprinkle, Smooch, fuse, slice, dice, AND then we set it on fire using a variety of heat tools.

Friday, May 29, 2015

rain delay - time to summarize

We're almost finished with this merry month of May deconstructed screen printing. A long post but lots of photos. I'm sure some of you are thinking ... "oh my goodness, Diane, so many steps, so many rules, so much preparation!  Why???"  Because with DSP or breakdown printing, the possibilities are endless, the personal interpretations can reveal your artistic voice and there's a surprise in every screen (with apologies to Cracker Jacks).  Not to mention, each original print can lead you to try beading, embroidery, or embellishment of all kinds.

Where will you get inspiration?  Anywhere there is texture, color and lines.  In other words - everywhere! Is this mystery photo below a deconstructed screen print?  Sure looks like one to me.  Keep reading to learn where the photo was taken.

Prepare the fabric
Soak cotton fabric for at least 30 minutes in a solution of nine tablespoons to one cup (recipes vary) to one gallon of water.  Wring out the soda water back into the bucket to reuse. Handwoven fabrics take longer to dry and seems like forever in 98% humidity. See the sky reflected in that puddle out there? That's my backyard and the waters have actually receded a lot. As long as you're looking, notice the last few gardenias on the bush on the left.  Still a heavy perfume in the air.

Don't iron your soda-soaked fabrics - they are likely to get scorched - and I am not risking the same by using the dryer.  Steady and slow.  That's me... :(

Not really!  I dug up some fabrics that had been stretched on a print board a couple of years ago and not used in a demo - so you know I have so many print boards that one can sit with unused fabric on it for years.

Prepare the screens
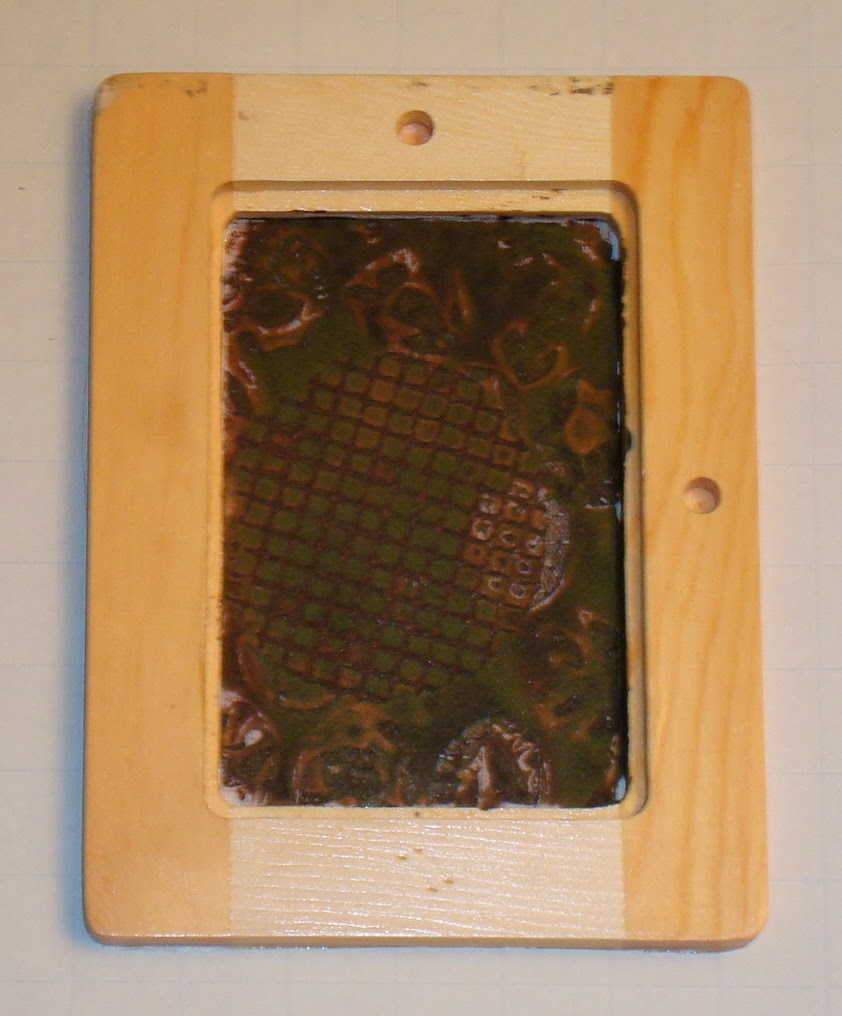
The dye on the screens has to be dry. I like to draw on the bottom side of the screen with thickened concentrated dye. At my house, it takes at least overnight for dye to dry on the screen.  You can speed it up with a hair dryer but be careful you don't blow it around and spoil your intended design.
 
Stretch the dry soda-soaked fabric on print boards
I use two layers of corrugated cardboard, covered in batting and protected by clear vinyl tablecloth.  All duct taped to the underside.  Short T-pins work well, pressed well down and out of the way of the screen.
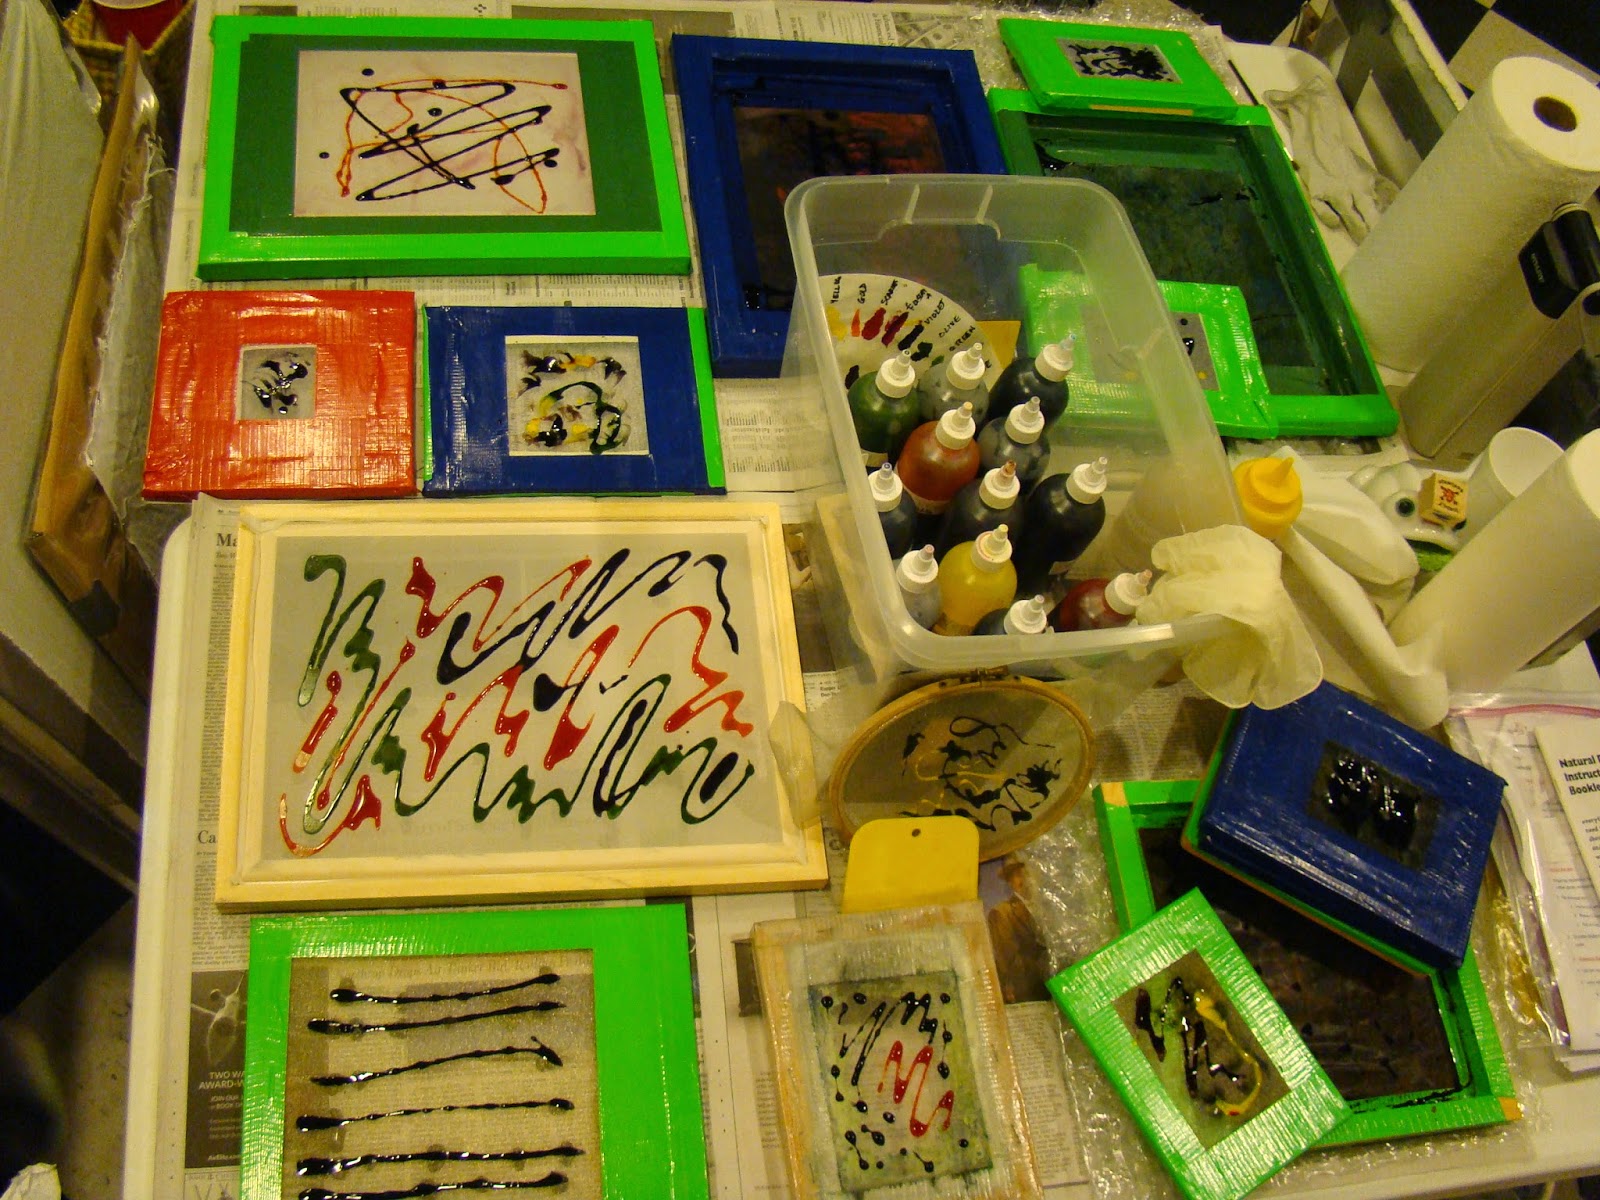
This is a loosely woven cotton shawl about 30 inches wide and a couple of yards long.  I have it arranged on the board so that I can print a border on each end and the middle is folded up and protected against drips and splatters by a piece of cloth.

Pull the prints
I used clear print paste which is just the thickener and a plastic squeegee - an old credit card will work also.
The screen printed really well!  There was some left over fushia (maybe?) and some olive green that I had applied a couple of days ago.  The stripes magically aligned from one print to the other because I had been careful in planning it.  Or it was just dumb luck  You decide.
There was only enough dye on the screen for one border so I applied more dye to the back of the screen and have to wait while it dries to complete this project  It will only be a border print and probably I will have lots of backstaining over the entire shawl which really will not disappoint me.  A little more color will make it more interesting.

Batch the prints
While I am waiting for the added dye on the screen to dye, I have placed plastic over the first border so it can batch for at least 48 hours.  Because the second border will have to batch that long, the first border will be batching twice as long but in this case, more is better. Batching is just letting the wet dye sit on the cloth long enough to make a strong bond.

Wash out excess dye
One last step in the process.  Washing up.  A sometimes discouraging step.  You will lose some color.  No home dye formulation can be 100% perfect.  Printing lays down more dye than the fabric can chemically take up, so the excess has to be removed.  If you have vast areas of white fabric that is presoaked in soda, you may get some staining there, so the better choice is to avoid wide open white areas.  Cover your design with dye if you can.

First wash with cool water to remove the thickener and excess dye.  When you are bored with this step and the rinse water is mostly clear, begin to wash in very hot water with Synthapol or blue Dawn dishwashing soap.  The soap will help prevent the backstaining.  The hot water will loosen up the rest of the unused dye.  I usually get my electric kettle whistling with boiling water and pour into a bucket.  Add hot water from your faucet to bring the temperature down to about 140 degrees F.  Let your fabric soak with a little soap overnight.

Take a break, read your email, go for a walk. Washing out is not the fun part of this job.  Wring out and do another hot soak and washout.  If you still have color in the rinse water, keep doing the 140 degree F soak with soap.  I usually finish up with a small hot load (adding water from the whistling kettle, too) in the washing machine - assuming all the fabric is in a similar colorway to avoid cross backstaining.

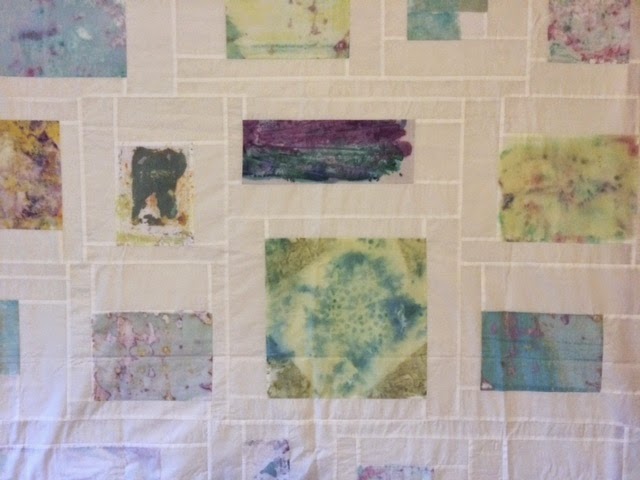
Here's my washed-out, still slightly damp deconstructed screen printing on the borders of a handwoven scarf from Dharma. 

I was really pleased to find there was no backstaining in the center of the scarf.  I must be getting better at this dyeing thing.  :)
 Here's that mystery photo from the corner of the ladies room at Art Supply on Main. I love that they pulled up the old flooring and didn't bother to paint or refinish.  Or maybe they have by now, I'll have to drop in and check one of the these days. Judging by my stash of art supplies, I do not need to go shopping at an art supply store, but still, there could be something new to try ....

Hope you enjoyed this month of posts on deconstructed screen printing.  Writing up the May posts here got me excited all over again about printing.  Check out my blog for more current work and come back here for Fabric Collage with Cris Winters in June.

Diane
http://yarngoddess.wordpress.com

linking up with Nina Marie's Off the Wall Friday


Wednesday, May 27, 2015

put on your mask and gloves, it's about to get messy

So... we've been looking at deconstructed screen printing this month.  First I showed you some finished work combining other fiber techniques with this dye process.  I've suggested trying unusual fabrics like handwovens and some examples of framing the finished work. I admit I was just trying to get you interested in the process!  Then I gave you some information on how I make screens and padded print boards.  Next you need some basic information on the dyes and the release paste. 


I like to use squeeze bottles with screw tops that don't get lost.  The dye is thickened but these tops have worked well and are a lot less messy that scooping out blobs of dye - fewer  spoons or spatulas to wash when I'm printing. I mix the dye paste in square tubs so that pouring it into the bottles doesn't require a funnel - just a steady hand.  You may prefer to use a funnel.  Once a tool is used for dye, DO NOT return it to your kitchen for use with food.  Mark the tool with paint or permanent marker that it is "for dyes only." 

The dye is MX Procion dyes.  You make a concentrated paste with water and urea to help it dissolve more easily.  I always use gloves and a sturdy face mask (with the metal strip that fits snugly on my nose) while the jar containing the powdered dye is open.  Once I have the lid back on and the dye powder is completely wet, the mask can be put aside.  I work in the sink with newspaper protecting the counter tops.  If any powder is spilled in the sink, it is easy to wash it away.  You can spritz the newspaper lightly with water and that will help control any dust that might float around. Work in an area where children and pets will not wander in and out.  I don't have a mask that fits my dog, Oscar, so he is banned from the room until the mixing is all done and cleaned up.  Once the dye is in solution, the dust is no longer a danger to anyone's lungs.  Label all dye containers carefully and store away from food and drink products.  More on safety and best practices can be found on Paula Burch's dyeing site as well as on the dye distributors' websites.

Here's Oscar hanging out while I mix up the dyes.  Look, he's smiling!


Okay, so once you have a concentrated paste of dye with water and urea, you need to add some thickener so that the dye doesn't just run through the screen.  Sodium alginate is used as a food additive, so if you want to mix the thickener in your blender you don't have to relegate it to the craft room tools but it can be hard on the blender.  I wouldn't mix the dye with thickener in the blender because that will make the blender a dyes-only utensil and anyway, it's a big pain to wash out after each color.  Lately I've been trying the sodium alginate that is called print paste and it seems to dissolve easier than the bag I bought a long time ago that was only labeled sodium alginate.  A little patience is necessary.  Mix your thickener up on the day before you mix your dye concentrates so that it is ready to go.  Follow the directions on the package but double the quantity of thickener to water so that it is extra thick. When you combine the thickener with the pasted dye, it will be thinned down a bit.  If it's still too thick you can add a few drops more water, but it really needs to be thick enough not to run through the screen. You want to be able to push it through the screen with a squeegee.  You can buy premixed thickener but it would probably only be thick enough to use as the release paste when printing not to thicken the dyes. 

This is getting too wordy. Break time!  Stand up and shake your body.  We've both been looking at this screen too long.
Check out this print I made using an embroidery hoop temporary screen.  I was auditioning  some threads for free motion quilting.  It seems I get a different prospective when I look at a photo on the screen than when I am looking directly at my cloth.  This is the fabric that is the background on my blog. It became the cover for a Japanese stab bound book that I swapped at a Book Arts Guild meeting a couple of years ago.

Did you get off the couch and take a stretch?  Good, me too.  We have our thickened dyes, we have some plain thickener (also called release paste), we have made screens, we have some padded print boards, a squeegee. Oh, yes, we need some fabric!

I use 100% cotton, prepared for dyeing (PFD), or my cotton handwoven cloth.  On the day you mix up your sodium alginate, you need to presoak the fabric in a solution of 9 tablespoons to a cup of soda ash (not baking soda or washing soda) dissolved in a gallon of water.  You can soak it for 30 minutes or overnight.  It needs to be dry before printing - don't iron it and don't put it in the dryer - so line drying is it.  Groan, more waiting. The soda ash solution can be saved and reused.  Just wring out the excess solution back into the bucket.  Add a couple more tablespoons of soda ash if you soak a lot of fabric.  The soda ash dissolves faster in very hot water than in cold.

On Friday, we print!  Are you ready?

Diane - yarngoddess


Monday, May 25, 2015

printing on handwoven


Today, the subject is deconstructed screen printing on handwoven fabric.  If you need to know more about DSP or breakdown printing, as it is sometimes called, please refer to those terms in the right hand column of this blog under Labels or read through the December 2014 blogs by Beth and Judy.

This screen is turned upside down to allow the dye to dry on the screen - never let acrylic paint dry on your screen or it is a goner.  But dye is always soluble in water or in release paste which is just water thickened with sodium alginate.    The cloth has been pre-soaked in soda water solution (9 tbls to 1 gal of water) and allowed to dry naturally.
The cloth is stretched and pinned onto a print board which has some padding.  I use doubled corrugated cardboard covered in batting, then covered in clear vinyl tablecloth protector.  All of that is just duct taped on the back securely.  Mine have lasted for years.
This handwoven cloth was double woven on the loom and slits were strategically planned.  The soft sculpture was slid onto a clear tube for display.  This didn't make the cut for a weaving competition, but I really enjoyed the whole process. 
The frames below were canvas covered wooden stretchers and I removed the little rubber gasket that holds the canvas on the back.  I tried using it to hold the "silk" screen fabric which is actually polyester, but it was too slippery.  Screens have to be tight as drums in my opinion or it's too hard to lift them off the cloth after each pull.  They stick and you can ruin your image trying to lift it off.
I painted them with a water wash-up type of polyurethane.  Lower odor, easier cleanup.  Three or four coats all around. Below is one with the dye on it ready to print.  Notice that the face of it has a raised edge and the wood slopes toward the middle.  That's okay on the front but the back where the screen is attached has to be absolutely flush to the printing surface. 
For this one, I just taped the back and the edges to cover the edge of the screen fabric.  No little gutter on the front.  Since I don't wash these I don't worry about the water running under the edge from the front.
Here's an in-process shot of gluing the screen fabric onto the wooden frame.  Sorry for the messiness of these process shots, I took them mostly to remind myself which glue I used.  Several I tried were not reliable.
You can see the orange screen fabric taped down to the table. The frame (with the glue applied liberally edge to edge, but not messily, to the back) is being pressed down with bricks. I covered four bricks with fabric for my daughter's wedding since we weren't sure if it would rain or not.  I had an arch covered with rushed fabric and twining ivy.  Outside we could just poke the poles in the ground. But if we had moved the ceremony inside because of bad weather, I planned to use the bricks on the dance floor for the arch.  As it turned out the bricks weren't used, her wedding day was perfect.  The bricks have come in handy over the last fourteen years as clean weights for all kinds of projects.
 
Here's another screen made from a one dollar paint-it-yourself picture frame from the hobby store.  One side has a recess for the photo and backing.  The holes are for a little peg that holds the fame upright on a desk.  This side, of course, had to become the up side of the printing screen while the front of the photo frame became the back  Clear?  I hope so!  Look, ma, no tape!  For this one, I glued it perfectly and just used scissors to trim the excess.  I love it - although it is one of my smaller screens. I never wash it.
Another one of my double-woven deconstructed screen prints, say that ten times fast!  This is a detail, I love the way the weave adds texture to the color of the dye.  I put a tape measure on the cloth and placed a commercial cotton next to it.  It's a sample from a eco/contact print that just happened to be handy.  Looking at the thread counts - in my handwoven, it's about 16 ends per inch compared to at least 200 for quilter's cotton. It's a difference in resolution, a lot like reducing the pixels in a photo blurs the photo somewhat.

Too bad I didn't print from that screen on some commercial cotton for a better comparison but at the time, I had no idea I would be rambling so much about the process here on the Fire blog. Since this is deconstructed screen printing, that screen is exhausted and no way I can reproduce the exact image again unless I print the photo image onto fabric with my Epson printer.  Now that would make an interesting composition - combining the handwoven with the digital print.

The double woven cloth is still pinned on the print board.  I have yet to dye the other side - there's a piece of plastic between the two layers - so it's still virgin cloth on the reverse.  Waiting for inspiration on what will go with this.  That's my story and I'm sticking to it.  But the digital print / handwoven mash-up is sounding like a good way to go.  I may even do some selective unweaving of the cloth to go with the deconstructed printing.  Deconstructed Deconstruction would be a perfect title.  


Here's the screen before printing.  
And several screens I've made that have only minimal taping. 
Thanks for following along this month.  Hope you'll try making a screen for deconstructed screen printing.

Diane - yarngoddess

Friday, May 22, 2015

prints in progress

What to do with those disappointing screen prints ones that seem too plain?
Nancy here again to share some prints in progress.
 
 
I am generating some ideas for working back into some pieces with 
Derwent Inktense pencils and/ or embroidery and beadwork.  I might 
use some gold leaf, or even Paintstiks. All of these media work well 
and do not change the hand of the fabric. 

Another thought is to mount a small motif on a tiny canvas and then 
do the embellishing afterwards. 


In order to learn embroidery, I just completed an online crazy 
quilting class. Previously I have only done the simplest of 
embroidery stitches and wanted to learn more.  
Here's my sampler on plain fabric. The course taught by Kathy Shaw 
was extremely helpful. Now I think I can tackle some free form 
embellishment of these abstract screen prints. 
 
These are works in progress. I'll let you know how my experiments turn out. 


My work will be in a pop-up show on Wednesday night. So tomorrow 
I am preparing for a framing day. Some are ready, others are sitting 
on mat colors testing them out. Some will be framed with multiple 
images, others will be cut up into small images and framed indiviually.  
These three are finished and ready to go to the pop up show. 
 
Nancy Warren  


Wednesday, May 20, 2015

overpacking and wishes granted

More on deconstructed screen printing with me! Diane and friends.  I don't travel light when I pack up to go to art camp.  A few years ago, I took all my thickened dyes and all my screens and a pile of soda-soaked fabric and really had a great time demonstrating for my friends.  They all come to art camp with their own projects but I usually manage to tickle them into trying something new.

Here's Nancy again printing with her own screens.  She lives in South Carolina now, so she doesn't bring as many supplies as can fit into a minivan. 

My table inside was so full of stuff I'd brought and it was such a beautiful weekend, I took the table I brought (!) and set up outside.  Lots of steps going in and out for supplies, screens, and more cloth.  Nancy and Susan chatting with me while I work.

Here's another venue - at a friend's home and we're printing on the driveway.  Loved those green gloves but they sprung a leak and I was marked for life - or maybe it was only a week.


Elisa and Pat seriously watching me work.  I try hard to keep the crowd entertained even while laying out the steps. They lightened up a bit when the demo was over and got started printing - deconstructed screen printing is fun!  And just look at the drying line running through the garage.

A lot of my screens are protected with green duct tape.  I like green and frogs.  In the beginning I washed out my screens and a lot of water collected inside since really duct tape isn't all that perfect or my taping wasn't - one or the other.  I tossed out a couple of wooden screens when I could feel the wood crunch and squish between my fingers.  My latest favorite screens have hardly any tape on them - I'll show you those in my next post.


Another venue with me demonstrating. I'm filling in spaces between the prints with extra dye.  It's green dye and I'm wearing a frog shirt.  :)   This time at the Contemporary Handweavers of Texas conference which are usually booked at a hotel.  I had listed all my "wouldn't it be nice" wishes when I put in the room requirements for my subject which was screen printing on handwoven fabric.  I got a classroom at a local art facility for my seminar with a sink and no carpeting on the floor plus this overhead mirror just like we used in college!  Well, almost like the one we had in the 60's. That one at Arizona State University was attached to the raised rolling table with more clearance underneath.  I banged my head on this one at least fourteen times.  Be careful what you wish for.

Diane - yarngoddess

Monday, May 18, 2015

laying down the prints

Good morning!  Diane back again, this time showing Nancy Warren's deconstructed screen printing. 


Nancy and I were members of a study group which met regularly to experiment with various techniques and projects.  We all were weavers who liked to branch out!  I showed them the video from Kerr Grabowski and we were off and running with breakdown printing.


In this example above, Nancy placed her screen right next to the previous print to cover the cloth completely.  Below is an example of one style of putting the dye on the screen that we called our Jackson Pollack period because we dripped the dye randomly around the screen and let it dry. 

Here's how the screen released - I think she went on to cover another cloth with prints from this screen because the drops were so juicy.


Nancy has had success in entering her work as framed art in several shows.  The photo below shows each print matted separately to emphasize their similarities and the progression of each pull.


Notice the lower one in this photo of Nancy at a gallery opening.  The prints overlap and  screens of different sizes are used to create the image.

Placement of the screen can be planned as you print or you can plunge ahead and consider it a design challenge later.

For basic information on deconstructed screen printing, select that Label on the right or click here. You can also read about the process in the December 2014 posts by Beth and Judy.

Diane - yarngoddess

Friday, May 15, 2015

screen printing Day 3 with Luann

(Luann Fisher is blogging this week on her experiments with deconstructed screen printing. She blogs at Let's Create Today.)

After batching, rinsing, washing, and drying I like to press. Colors come to life at this time. As you can see, some have vivid coloring and others not so much.


Already some are being prepared for using in projects by sashing them with various width strips of white. Wall hangings, quilt tops, art journal covers, or what ever else strikes my fancy…….


Lessons learned:
KISS: use small inexpensive screens, try to limit your color choices (and remember how they will react with each other so you don’t get brown when you wanted purple), only do a few pieces at a time (this helps with keeping track of what you actually did, and how you would like to change things), and take a few notes during the process, if you can.
Cover up: not only can you wreck clothing, but migrant dye particles get stuck on insulation boards, so cover them in plastic to elimate any future influences.
Write up your thoughts; not for duplicating, but for other possibilities that came to mind.