A TECHNIQUE DRIVEN Blog dedicated to mastery of surface design techniques. First we dye, overdye, paint, stitch, resist, tie, fold, silk screen, stamp, thermofax, batik, bejewel, stretch, shrink, sprinkle, Smooch, fuse, slice, dice, AND then we set it on fire using a variety of heat tools.

Friday, July 31, 2015

Screen Printing, glue screens

If you've stayed with me during the whole of the month, thank you. I hope that you've found something to inspire you to experiment with. For my last post I am going to look at using glue to create a design for screening. It's basically exactly the same as using soy wax but using cheap glue that is readily available. 

The best glue to use is a basic craft glue, the kind that children might use. This is the kind that I used


And this is my selection of tools for making the first screen.


The first thing is to put some glue into the tray. As you can see, you don't need much.


Dip one of your mark making tools into the glue ...


... and then lay it on the bottom of the screen to transfer the glue


Do this printing with several of your tools to make a composition that you are happy with.


Old credit cards can be good mark making tools.


Let the glue dry completely before using the screen to print with.

Dried screen, ready for printing.

Print your fabric as normal using thickened dye. This is the fabric partially printed.


And ready for batching.


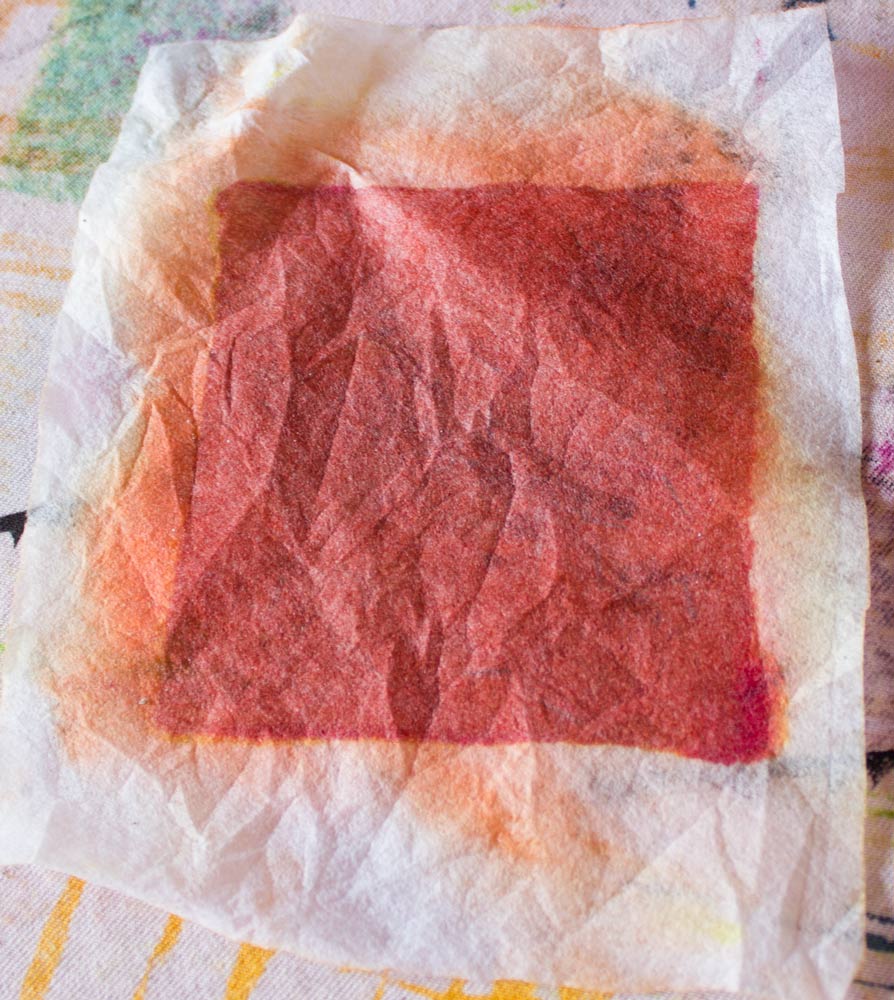
After washout. And a reminder that I need to make a stronger solution of charcoal!


One thing that I did discover is that glue screens disintegrate quite quickly. I used the screen to do a second piece of silk and you can see that not much of the design was left.


After washout there really wasn't much there at all.


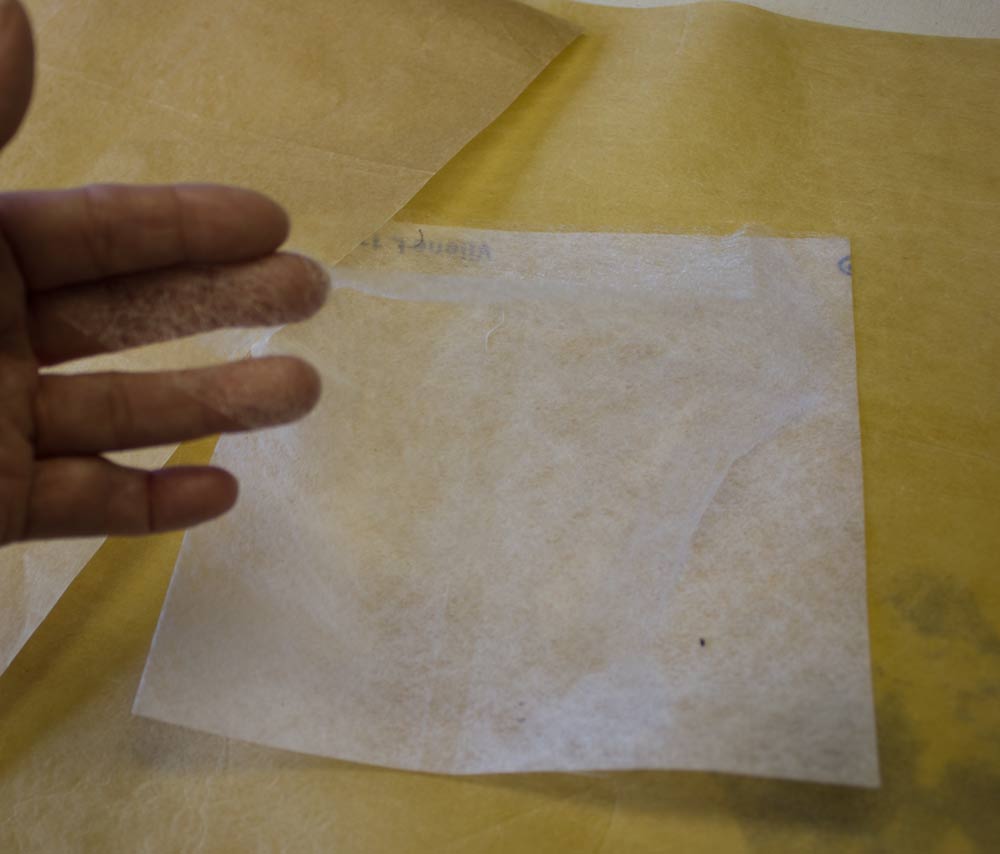
I had intended to do an interfacing screen with glue but the glue glooped all over the place and so I had to revert to a couple of old screens that I had made while I was in Linda Maynard's class. These were made in the same way as the soy wax ones. Put the glue onto the interfacing in whatever design you like and then, when the glue is dry, give the whole piece of interfacing at least two coats of household emulsion, allowing each coat to dry before painting the next. When everything is dry, wash the interfacing in hot water to remove the glue. It's a good idea to let it soak for about 10 minutes before you start rubbing.

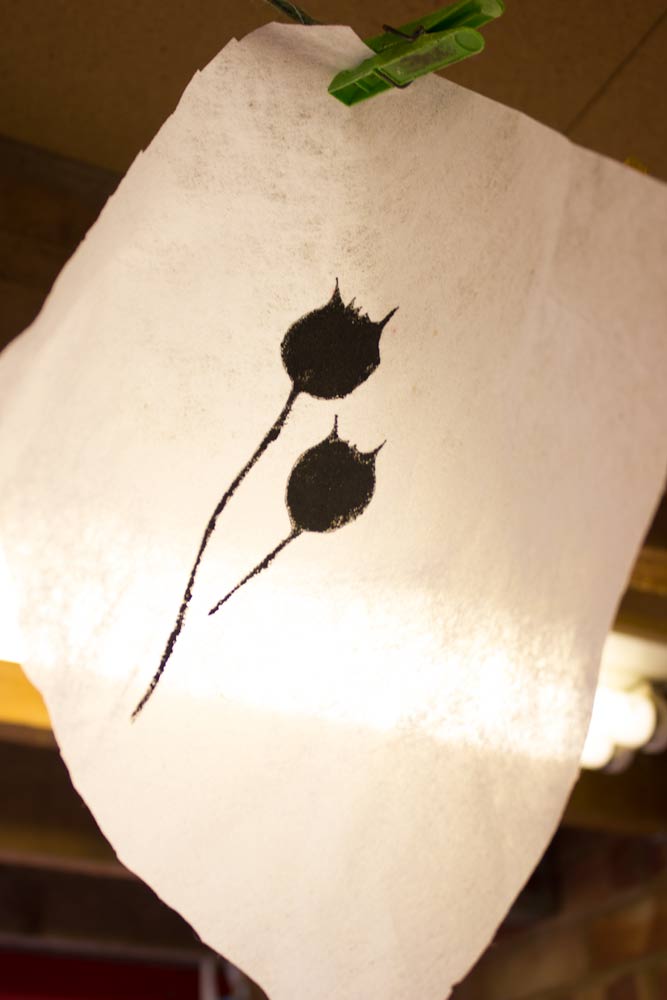
This was made by writing freely on the interfacing with the glue.


And this was just using the glue bottle to take a line for a walk.


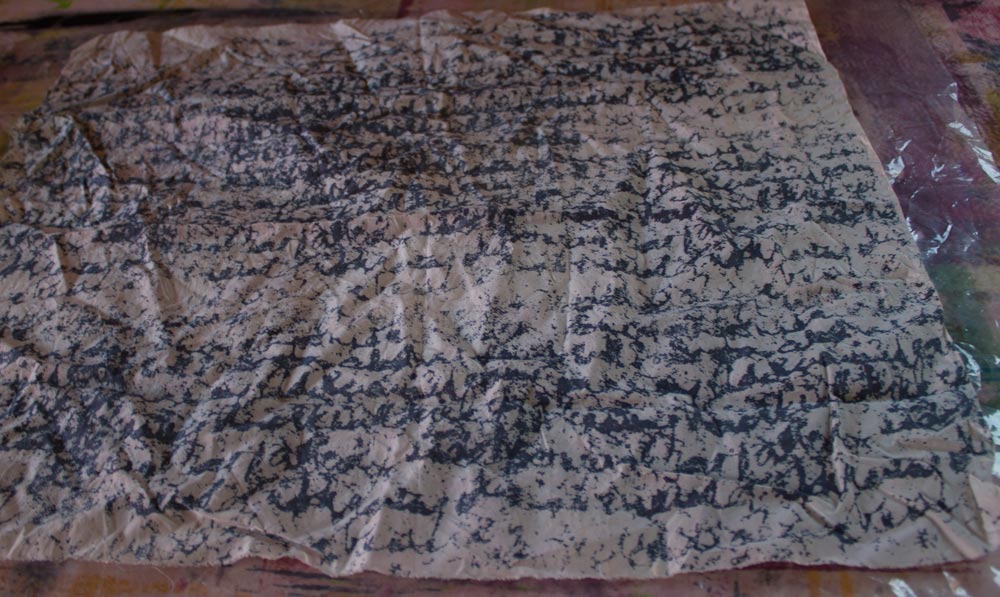
The writing has completely disintegrated and so the screen only printed a texture and the more geometric design had also become far less clear than when I first made it.


Not something that cannot be worked on further but a good lesson in how ephemeral the glue screens are compared to those made with soy wax.

Once again, thank you for staying with me. I've had fun doing the posts and it's made me far more aware of the need for taking process photos. I also have a good stash of newly printed fabric to work with.  I hope too that I've answered all the questions that came through in the comments. I have appreciated the supportive comments too and, although I haven't answered each one, I can assure you that I have read them. If you have any queries, feel free to email me. 


Wednesday, July 29, 2015

Screen Printing, vilene interfacing and fusible webbing.

This is a process that creates a very interesting background texture and, again, is very simple to do. I use Mistyfuse exclusively for my fusible webbing. If you don't know Mistyfuse, it is a lightweight fusible webbing that comes without backing paper. If you use a different variety then you will have to try it out and see how it works. Perhaps a note in the comments if you have success with different fusible.

This is what Mistyfuse looks like.


You are going to need a piece of interfacing cut to size for the bottom of your screen, with a margin for taping, and up to 6 pieces of fusible webbing cut to the same size as your interfacing.

Put the interfacing onto a piece of baking parchment, place one piece of fusible web on top of the interfacing and another piece of baking parchment on top. Iron with a hot dry iron, making sure that the whole piece is fused. Allow the piece to cool slightly before removing the baking parchment. Don't be tempted to do without the bottom layer of baking parchment. The interfacing will allow some of the fusible to go through onto your ironing board.


Repeat the process again, adding the second piece of fusible on top of the first. Repeat again with a third piece of fusible. You will need at least 3 pieces of fusible and can use up to 6. Fusing one piece at a time ensures a really good bond, rather than just laying all the pieces of fusible on at once. The effect when printing will be different according to how many you use. I'm going to show the different effects that you get with 3, 5 and 6 layers of fusible.

When you have your piece ready paint the edges with either wax or acrylic paint to both soften the edges and also to give them more body. I actually added some soy wax after I had taped my piece to the bottom of my screen and then forgot to take a photo of it! This is the interfacing taped to the bottom of the screen, before I added the wax. I taped it with the fusible next to the screen.


Place your screen onto your fabric and choose your first colour. I prefer to start to work from the centre and then print randomly for this technique.


For the first and second pieces I used the interfacing with 3 layers of fusible. The first is on a silk cotton mix and the second on silk noil. For the first piece I began with Royal blue and then changed to Golden Yellow. As you can see, it gives quite a heavy coverage.


With the silk noil I continued to use the Golden Yellow and then switched back to the Royal Blue. Still quite  heavy coverage but the texture of the silk noil creates a softer look.


I repeated the above with 6 layers of fusible attached. The coverage is much more dappled.

Silk/cotton mix

 Close up 

Silk noil

Close up

I actually did the  5 layered screen first, before I decided to compare the results of the layers. I used charcoal and chestnut brown, firstly on a previously dyed piece of heavy silk habotai. As this was my first attempt I did get a bit heavy handed and so lost some of the texture.


I then used the same colours on a piece of undyed cotton, again a bit heavy handed in places.


Because I was disappointed with these two pieces I decided to see what selected areas looked like. By using a piece of mount board as a frame I was pleased to see that smaller areas turned out to be very interesting. They definitely have potential.


This technique has so much potential for creating interesting backgrounds and, like the other interfacing screen techniques that I have covered, just peel off the screen at the end of the printing and wash it out, in cold water, so that it's ready for another day. I can't say how long these particular screens will last for as it is the first time that I have used this technique having discovered it in Screen Printing by Leslie Morgan and Claire Benn. It is an excellent book that I can recommend.


Monday, July 27, 2015

Screen Printing, vilene interfacing and acrylic paint (2)

Just a short post today on how to make your acrylic paint design even more interesting when it is printed.

Be warned, if you loved your design as it was, then you might want to paint another one as this is not a reversible process!

All you need to do is, with a pair of small sharp scissors, cut away part of the area that you painted. This will leave a void in the design that the dye will print through. You can see below that I cut away a small piece from both seed heads. You can also see from this photo that the painted design is not affected when the interfacing is washed out.


This is what it looked like when printed. I used a plain piece of white cotton for this.


This is a more geometric design that I made quite some time ago. I put a piece of plain paper underneath so that the cut out areas would show up.


And the silk/cotton blend fabric that I printed with it and subsequently made into a top. The fabric was undyed before being printed.


Friday, July 24, 2015

Screen Printing, vilene interfacing and acrylic paint.

One of the simplest ways to get a design onto vilene interfacing is to paint it with acrylic paint. This creates a resist so that the design is left as a void when printing. I have done geometric designs in the past but, this time, decided to take a look in my sketchbook for something that might be suitable and found some work I had done using nigella seed heads.


Cut a piece of interfacing that will cover the bottom of your screen, again leaving extra for taping to the screen. Make sure that you know the outer limits of the area that will print - you don't want your design to be cut off. For this method, choose a colour of paint that will show up against the interfacing.You don't have to but it will make life a lot easier if you do!

Paint your design onto the interfacing, be generous as you want good coverage. When you have painted the design, turn over the interfacing and you will be able to see where there has not been a good coverage. See the fuzzy edges below? The dye will print through them if they are left like this. 


When the first side is dry, paint the reverse side of the interfacing, making sure that you get a good coverage on all the edges - unless you are aiming for fuzzy of course. The easiest way to check how good the coverage is, is to hold the interfacing up to the light. That will reveal any missed spots. I could se that there were still some areas that needed more paint.


Once you are happy with the coverage, leave the interfacing to dry completely and then heat set the design. Put the interfacing between baking parchment and press well with a hot, dry iron on both sides. Don't use stream for this. Your interfacing will now be ready to use.

Tape it to the bottom of the screen as usual, making sure that your design sits within the area that will print. This is mine ready to print over a previously dyed piece of cotton.


The interfacing will behave in the same way as the one that I did without any design on it so you can use more than one colour and let them blend. I used magenta and chestnut brown to overprint.


Wash your interfacing out in the normal way and save for another time. Because you heat set the acrylic paint it will be permanent.

A short post next time on how to add a little more interest to your design. 


Wednesday, July 22, 2015

Soy Wax and Screen Printing, vilene interfacing

Today I'm going to look at creating a vilene interfacing screen design using soy wax. As far as I can see there are two real advantages to using this method. Firstly, if you like the design, then it will last for a long time and will not tie up one of your screen printing screens, especially if you don't have that many. Secondly, if like me, you like to overprint onto fabric that has already been dyed, you are only going to be printing the positive image rather than the negative one. Perhaps that is more easily explained with a photo I took of a piece of silk noil where I printed the left hand side with an ordinary soy wax screen (the negative) and the right hand side with an interfacing screen which was similar in design (the positive).


To create the design, first cut the interfacing to the size of your screen aperture, with a little overlap so that you can tape it. Using your melted soy wax and one, or more, of your mark making tools, add the wax to the interfacing. I simply used a paintbrush for this one, although I have stamped with simple shapes, like cardboard tubes, in the past. You will need to look carefully at the next photo to see the wax on the interfacing because it is almost the same colour. I tried to get in as close as possible so this is only part of the full design.


When the wax is dry, which doesn't take very long, lay out the interfacing onto a sheet of plastic and paint over the whole of the piece with emulsion paint, including painting over the wax. You will probably need to do at least two coats so make sure that each coat dries before painting the next one. Again, not easy to photograph as the only paint I had was white, I also took the photograph after only one coat so that it would still be possible to see the wax design through the emulsion. You could use any colour you have to hand as all the emulsion will be doing is to seal off the interfacing where there is no wax. 


You do need to be patient now to make sure that the paint is completely dry because the next step is to wash out the wax. To do this, simply wash the interfacing in hot water. Rub the areas of the design gently so that you don't tear the interfacing and you will find that the emulsion that was over the wax washes out easily and then the wax itself will wash away too. Unless you have hands that can stand extremely hot water then I suggest using gloves for this process. When all the wax is washed out, dry the interfacing and if, like mine, it's a bit crumpled, just iron it. This next photo is of the interfacing washed out and taped to the bottom of the screen. The design shows up really clearly now.


Print as normal onto your chosen fabric (soda soaked). This was a piece of silk that had been previously dyed.


And after washing out.


Once you've finished with the printing, remove the interfacing from the bottom of the screen and wash it out. Leave it to dry and then store it for later use.

This may seem like a rather long winded way of making a screen but, with the exception of creating a thermofax screen, I have found it one of the best ways to get a design onto fabric that would be difficult any other way.  I used a screen made this way to print onto this piece of cotton fabric.


And the same screen used on silk noil which was made up into a skirt. 


This particular screen was made a couple of years ago and has probably printed about 4 yards of fabric so far and is still very useable. Some of the emulsion has started to deteriorate recently but I think it's earned it's keep. You can see where some of the emulsion is coming off in this photo. No problem at the moment, just additional texture!


Next up on Friday, using acrylic paint to create a design on your interfacing.


Monday, July 20, 2015

Screen Printing, vilene interfacing.

Back at the beginning of this series of posts I included vilene interfacing as one of the tools. You may remember this ...


I hope you managed to find some, or, if you have been waiting to see how it works, you will feel inspired to get some.

The easiest way to begin is simply with a piece of interfacing that covers the opening of the screen. I like to do it with a square and, because I don't have a small enough screen, I simply taped the inside of the screen to make the opening smaller. This is about 4" x 4". Ignore the markings on the screen mesh, they have been there since I used this to make a flour paste screen and they don't normally show up in the print.


Cut a piece of interfacing to cover the opening and tape it to the bottom of the screen. That really is all that you have to do.


The best way to do this is to use several colours. I decided to use some yellows, magenta, lime green and a chestnut brown. Bear in mind that when you change colour, some of the previous colour will still be in the interfacing and so will affect the colour that you are using, at least initially. It is also more interesting if you scatter your prints randomly across the fabric.

After pinning out your soda soaked fabric, start to apply your first colour. I used acid yellow for the first prints. I also apologise for the marks on the squares, I forgot to wash out mu drop cloth and so some of the dye that was on there bled through.


Change to your second colour and add more prints. I used lemon yellow for this, and although the difference is subtle it is there.


Change colour again, this time I went with Golden Yellow. This time the difference is more obvious and you can see how the two squares on the right are lighter because there was still some of the lemon yellow in there.


I then went with magenta. I worked from right to left so that the difference would be easier to see. 


The last colours that I used were lime green and chestnut brown.  The green doesn't show quite as much but you can see hints of it. The layering that you get with this method is now really obvious.


After batching overnight and then washing out, this is the final result.


All you have to do now is to take the interfacing from the back of your screen and wash it out. It will retain some colour but it won't affect the next time you use it.


I store my interfacing screens in plastic wallets in a ring binder so that they are easy to find. If the creasing stops it from lying flat on the screen next time, you can always iron it lightly. I always protect it with baking parchment when I'm ironing so that I don't melt it.

You don't have to use as many colours. Red blue and yellow can create some wonderful combinations but do start with the lightest colour first.

On Wednesday I'll be bringing the soy wax back into play to use with the interfacing. Some household emulsion paint will be needed too. I'm not sure if that is a universal  name for the paint but, if it isn't, then it's the paint that you use on your interior walls.