A TECHNIQUE DRIVEN Blog dedicated to mastery of surface design techniques. First we dye, overdye, paint, stitch, resist, tie, fold, silk screen, stamp, thermofax, batik, bejewel, stretch, shrink, sprinkle, Smooch, fuse, slice, dice, AND then we set it on fire using a variety of heat tools.

Monday, September 26, 2016

more stitched and clamped resist

A workshop in the Guild House at the end of August.  I cannot tell a lie, I never pass up an indigo vat - it's always more fun to dip with friends. 
Connie was in charge of the two vats, one was made the old fashioned way and one with pre-reduced indigo crystals.  Both require that the vat is the right pH and the easiest time to do this is before adding in the blue indigo or you won't see the color accuratly on the indicator of pH stick.  Some pointers are so simple; why haven't I heard this before? 

In the kit of materials for the workshop, there was a crisp square of linen and I ironed an accordion fold and then made very long stitches through the center of the fold and pulled it up tight.  If you spritz the fabric with water, you can often pull up even tighter but this linen was resisting my efforts.  Crossing my fingers this will have some definition.  I used buttonhole twist doubled for the stitching.

Here is the bundle after the first dip in the indigo - still turning from that neon green to indigo blue.  Gotta capture it in photos because the green doesn't last. 

Here is the linen, finished and ironed.  A nice repeat that would be a cool background for embroidery.

An even quicker method is to use zip-ties for a resist.  They are plastic single-use fasteners you can find at the big box home improvement stores.  They come in wonderful colors, too. 
Once the fabric has been dipped in indigo and allowed to oxidize, you have to snip the plastic fastener to release it.  I hear there are reusable ones, but I haven't found them in stores yet.
Here's the way the zip-tied fabric turned out - fast and easy.

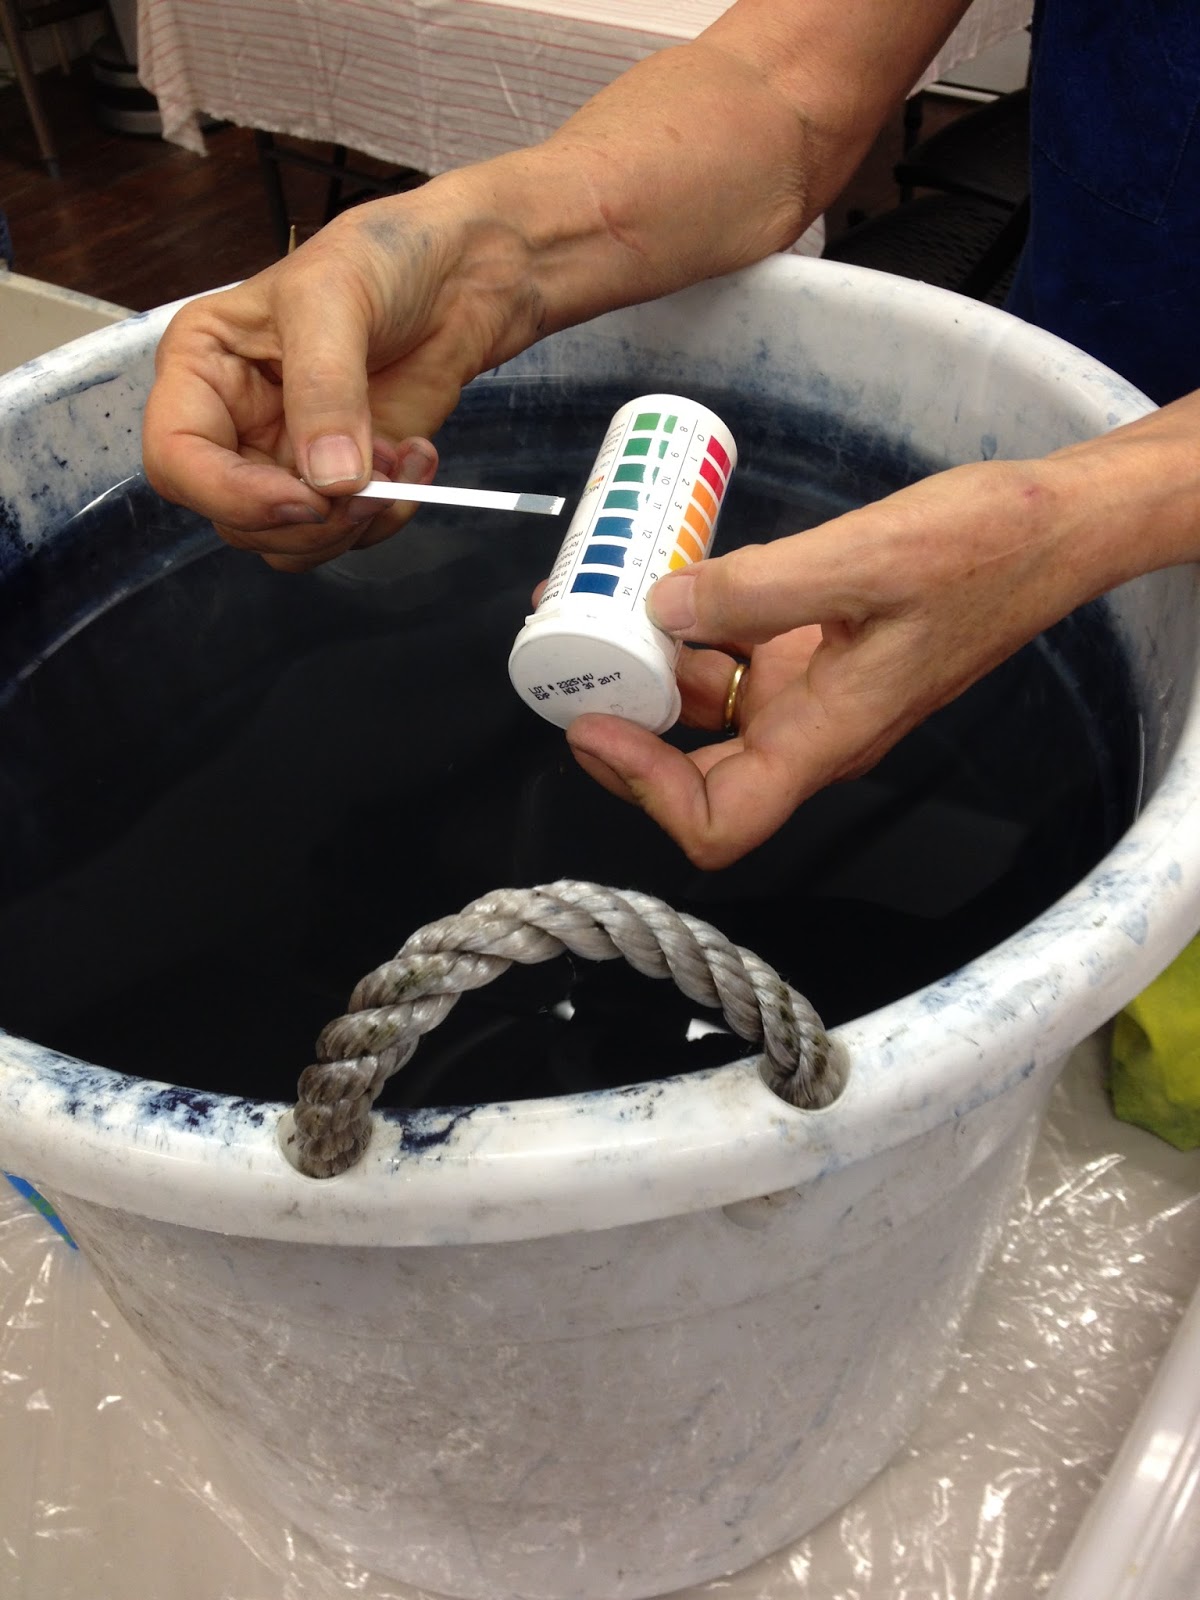
In every workshop there is at least one nugget of information that is memorable and worth the fare.  First it was test pH before adding indigo and then this one!  Double bonus in this workshop. Connie uses pony beads to begin her stitching lines.  Below you see them before she has pulled up the stitching and they are obviously reusable as you can see by their color. 

Below is one of her shibori dragonfly napkins...
... and she is demonstrating how easy it is to do by folding down the mid point of the body.  She draws her circles with water soluble pencil.  The wings are drawn and then stitched either by folding and using a running stitch or simply a running stitch along each side - she did both styles of stitching.


My husband has been cleaning out the garage lately and I scored these two instrument panel fronts that his company produced for an engineering firm.  They did a lot of panels and some were rejects for one reason or another.  They were cut using a CAD system.  I folded some canvas cloth and clamped it between two of the instrument panels matching the holes exactly. 

Here is it with some of the green glow still on it.  I had to refold and dip a second time to get all four squares with holes. 

I see reflections in a skyscraper window.  A little wavy; a little shadowy.  Again, I think some embroidery is in its future.

3 comments:

  1. You didn't mention what the correct pH is. In case I ever get up the courage for the indigo vat, it would be great to know.

    ReplyDelete
  2. The best range for indigo is 9 to 11. 9 is kinder to silk fibers and 11 is better for cotton and viscose. Vinegar is often used to return fibers to their natural pH. Check your plain water, too, before you start adding anything.

    Diane

    ReplyDelete

Although this blog is no longer active, we will get your comments so please feel free to share them.